Step-by-step: Define a New Product in Planship
In this guide, we'll walk through how to add a hypothetical product in the Planship Console. Let's get started.
Our hypothetical product
For the purpose of this guide, we'll model a hypothetical product capable of sending notifications via Email, Slack and SMS. The product will offer auto-renewing subscription plans that provide tiered access to product functionality as follows:
| Free | Personal | Team |
|---|---|---|
| Email only | Email and Slack | Email, Slack, and SMS |
| Up to 5 notifications per month | Up to 50 notifications per month | Up to 200 notifications per month |
| Up to 120 characters per message | Up to 240 characters per message | Up to 1000 characters per message |
Identifying Planship levers
From the plans above, we can identify three pricing dimensions of our product:
- Available integrations (Email, Slack, and/or SMS)
- Maximum number of notifications per month
- Notification message size limit
Understanding the dimensions is critical because they directly correspond to Planship feature and metered levers. In turn, correctly defined Planship levers will enable us to apply appropriate entitlements to various plans and enforce these entitlements in our product code. The dimensions that we identified will map to the following Planship levers.
- Integrations - feature lever of list type
- Notifications per period - metered lever with total usage per subscription period aggregation formula
- Notification max characters - feature lever of integer type
Creating a new product
Let's start by signing into the Planship Console. If you don't have a Planship account yet, sign up now.
Once signed in, navigate to the desired organization (E.g. the default organization automatically created by Planship) by clicking on it. Then create a new product by clicking the New product button. Give the new product a name (E.g. 'My product'), and click the Create button to save it.
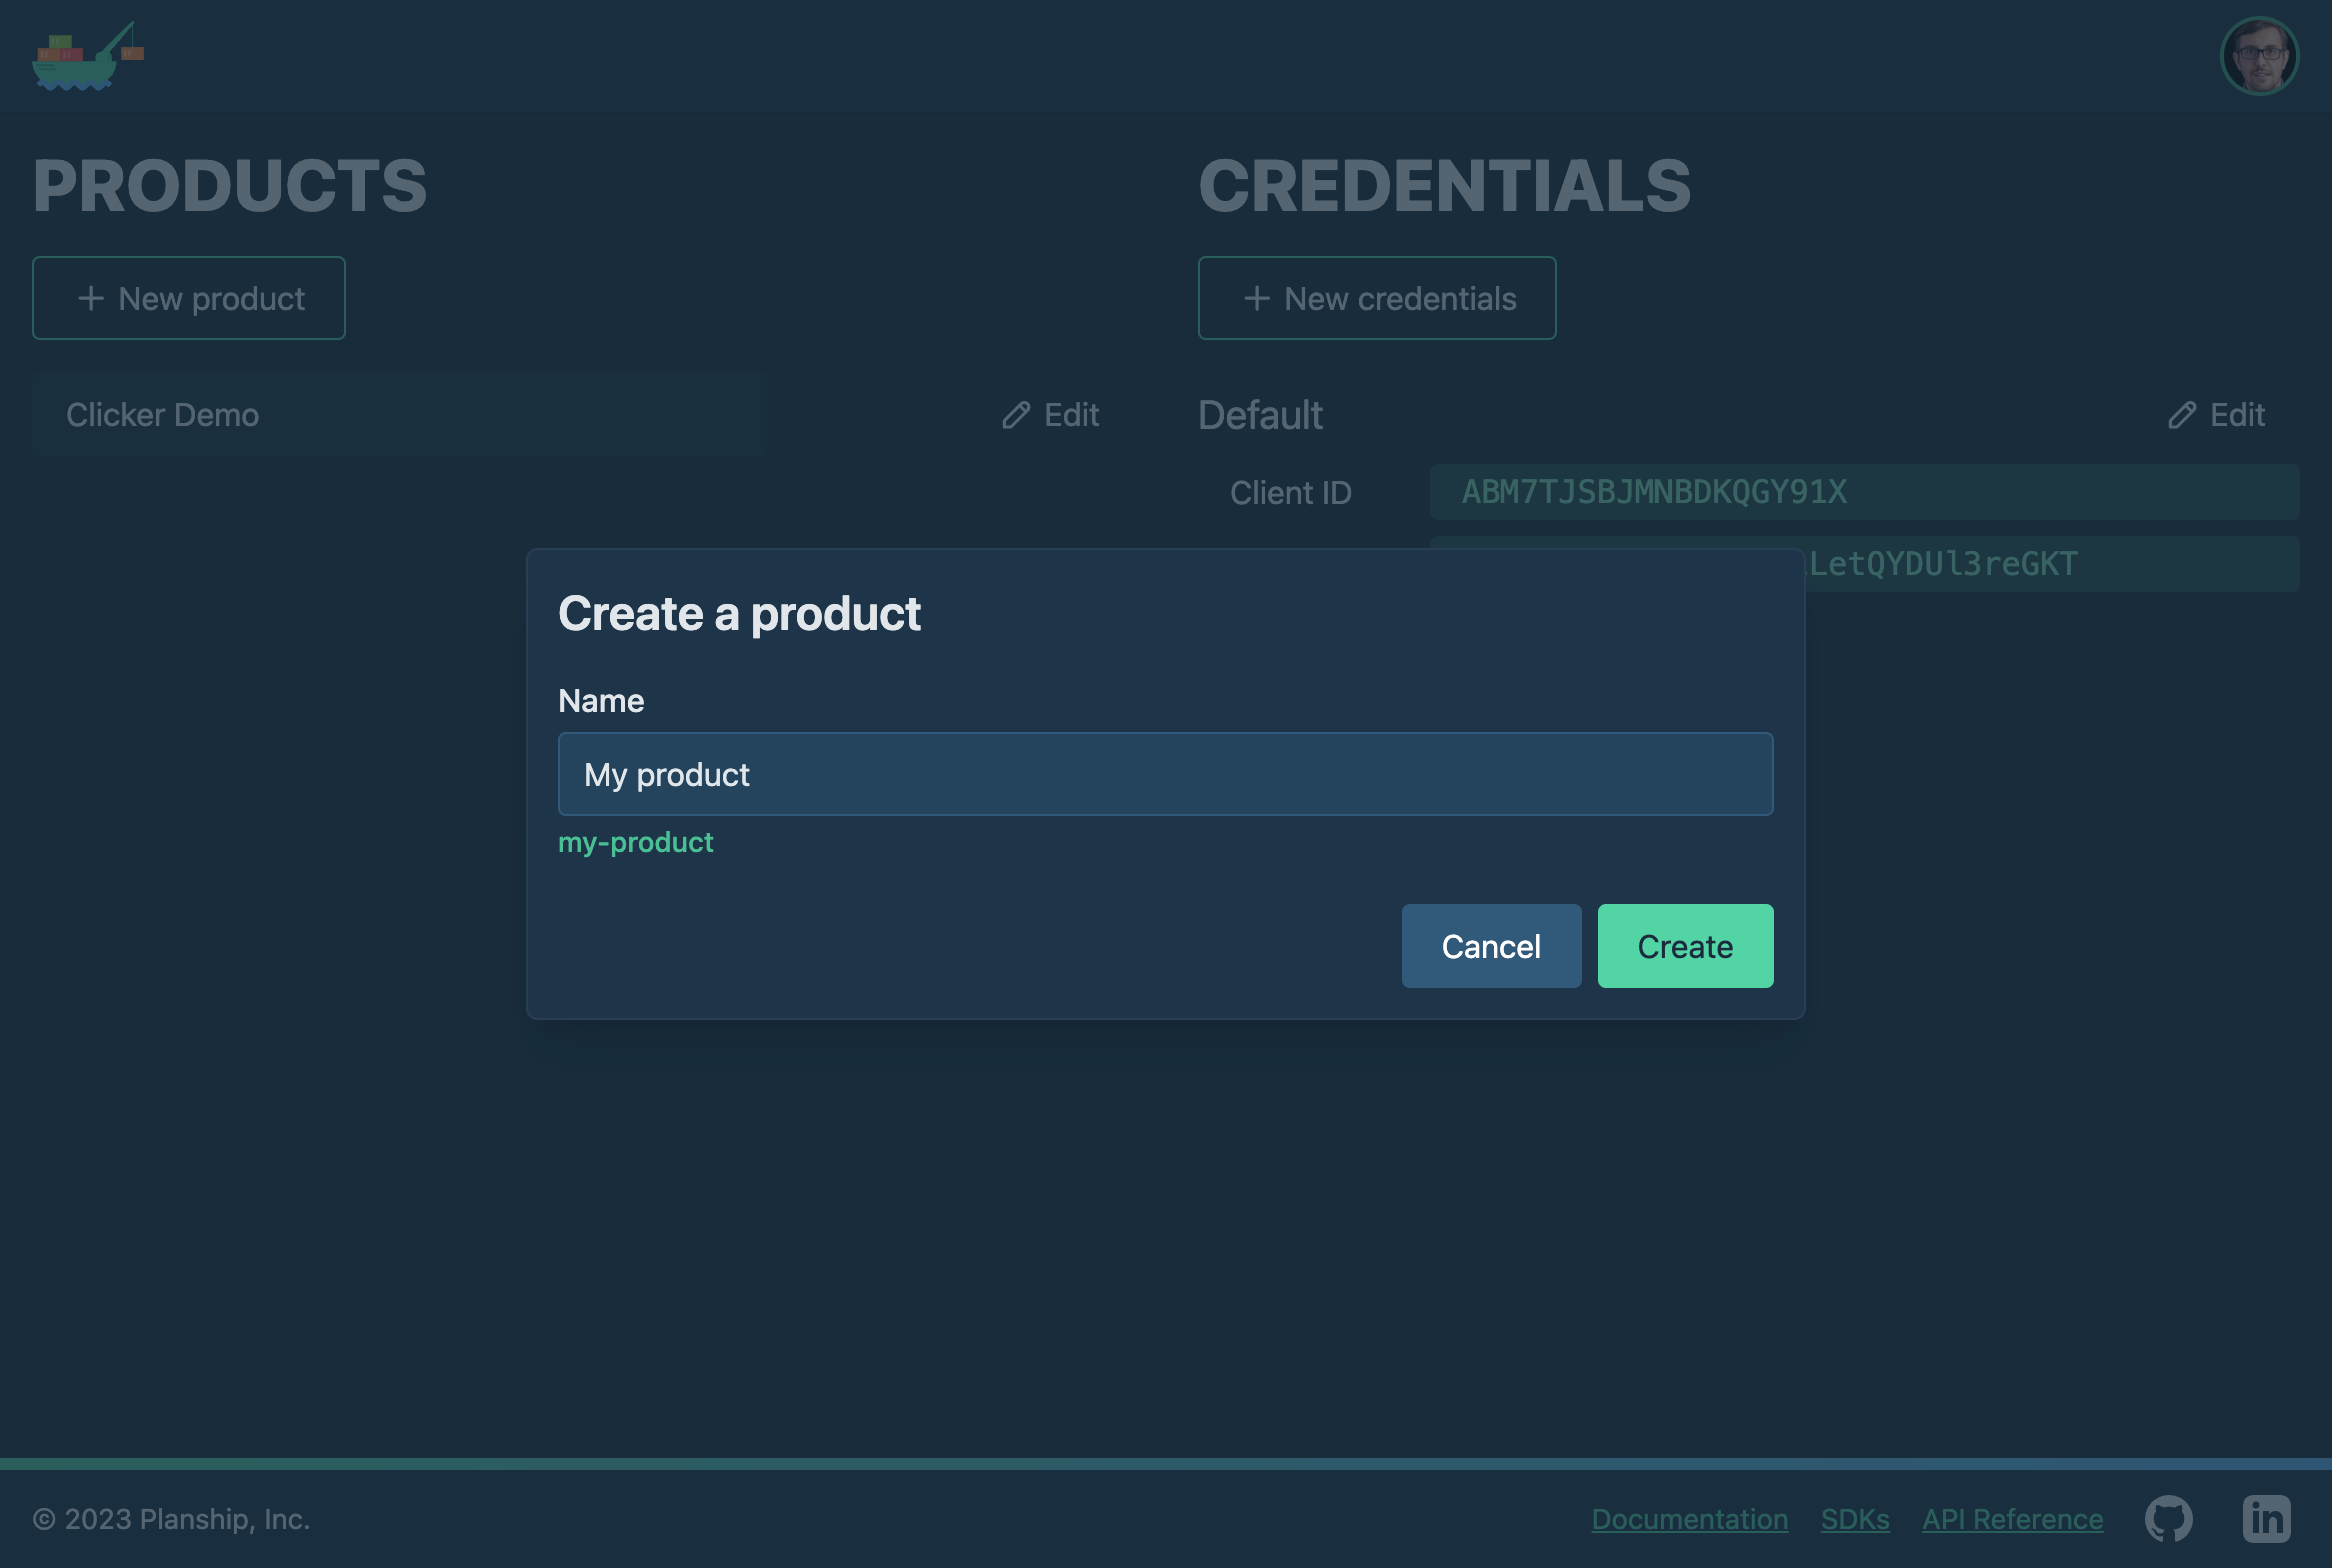
The name that we choose for our new product is important as Planship will use it to generate a product slug (E.g. 'My product' -> my-product). The product slug is the unique identifer of a product in Planship API operations. For instance, we will use it to identify the product when initializing the Planship API client.
Note
The Planship API uses slugs to identify resources like products, plans, and levers, and they are unique within the scope of their parent and type. Please note that changing a product, plan, or lever name will result in a change of its slug, which will likely break your existing Planship SDK integration unless a refactor is performed.
Now, navigate to the newly created product by clicking its name.
Creating levers
The new product is empty; it has no plans or levers defined in it. Let's start by defining all of the levers that we identified earlier, starting with the Integrations list feature lever.
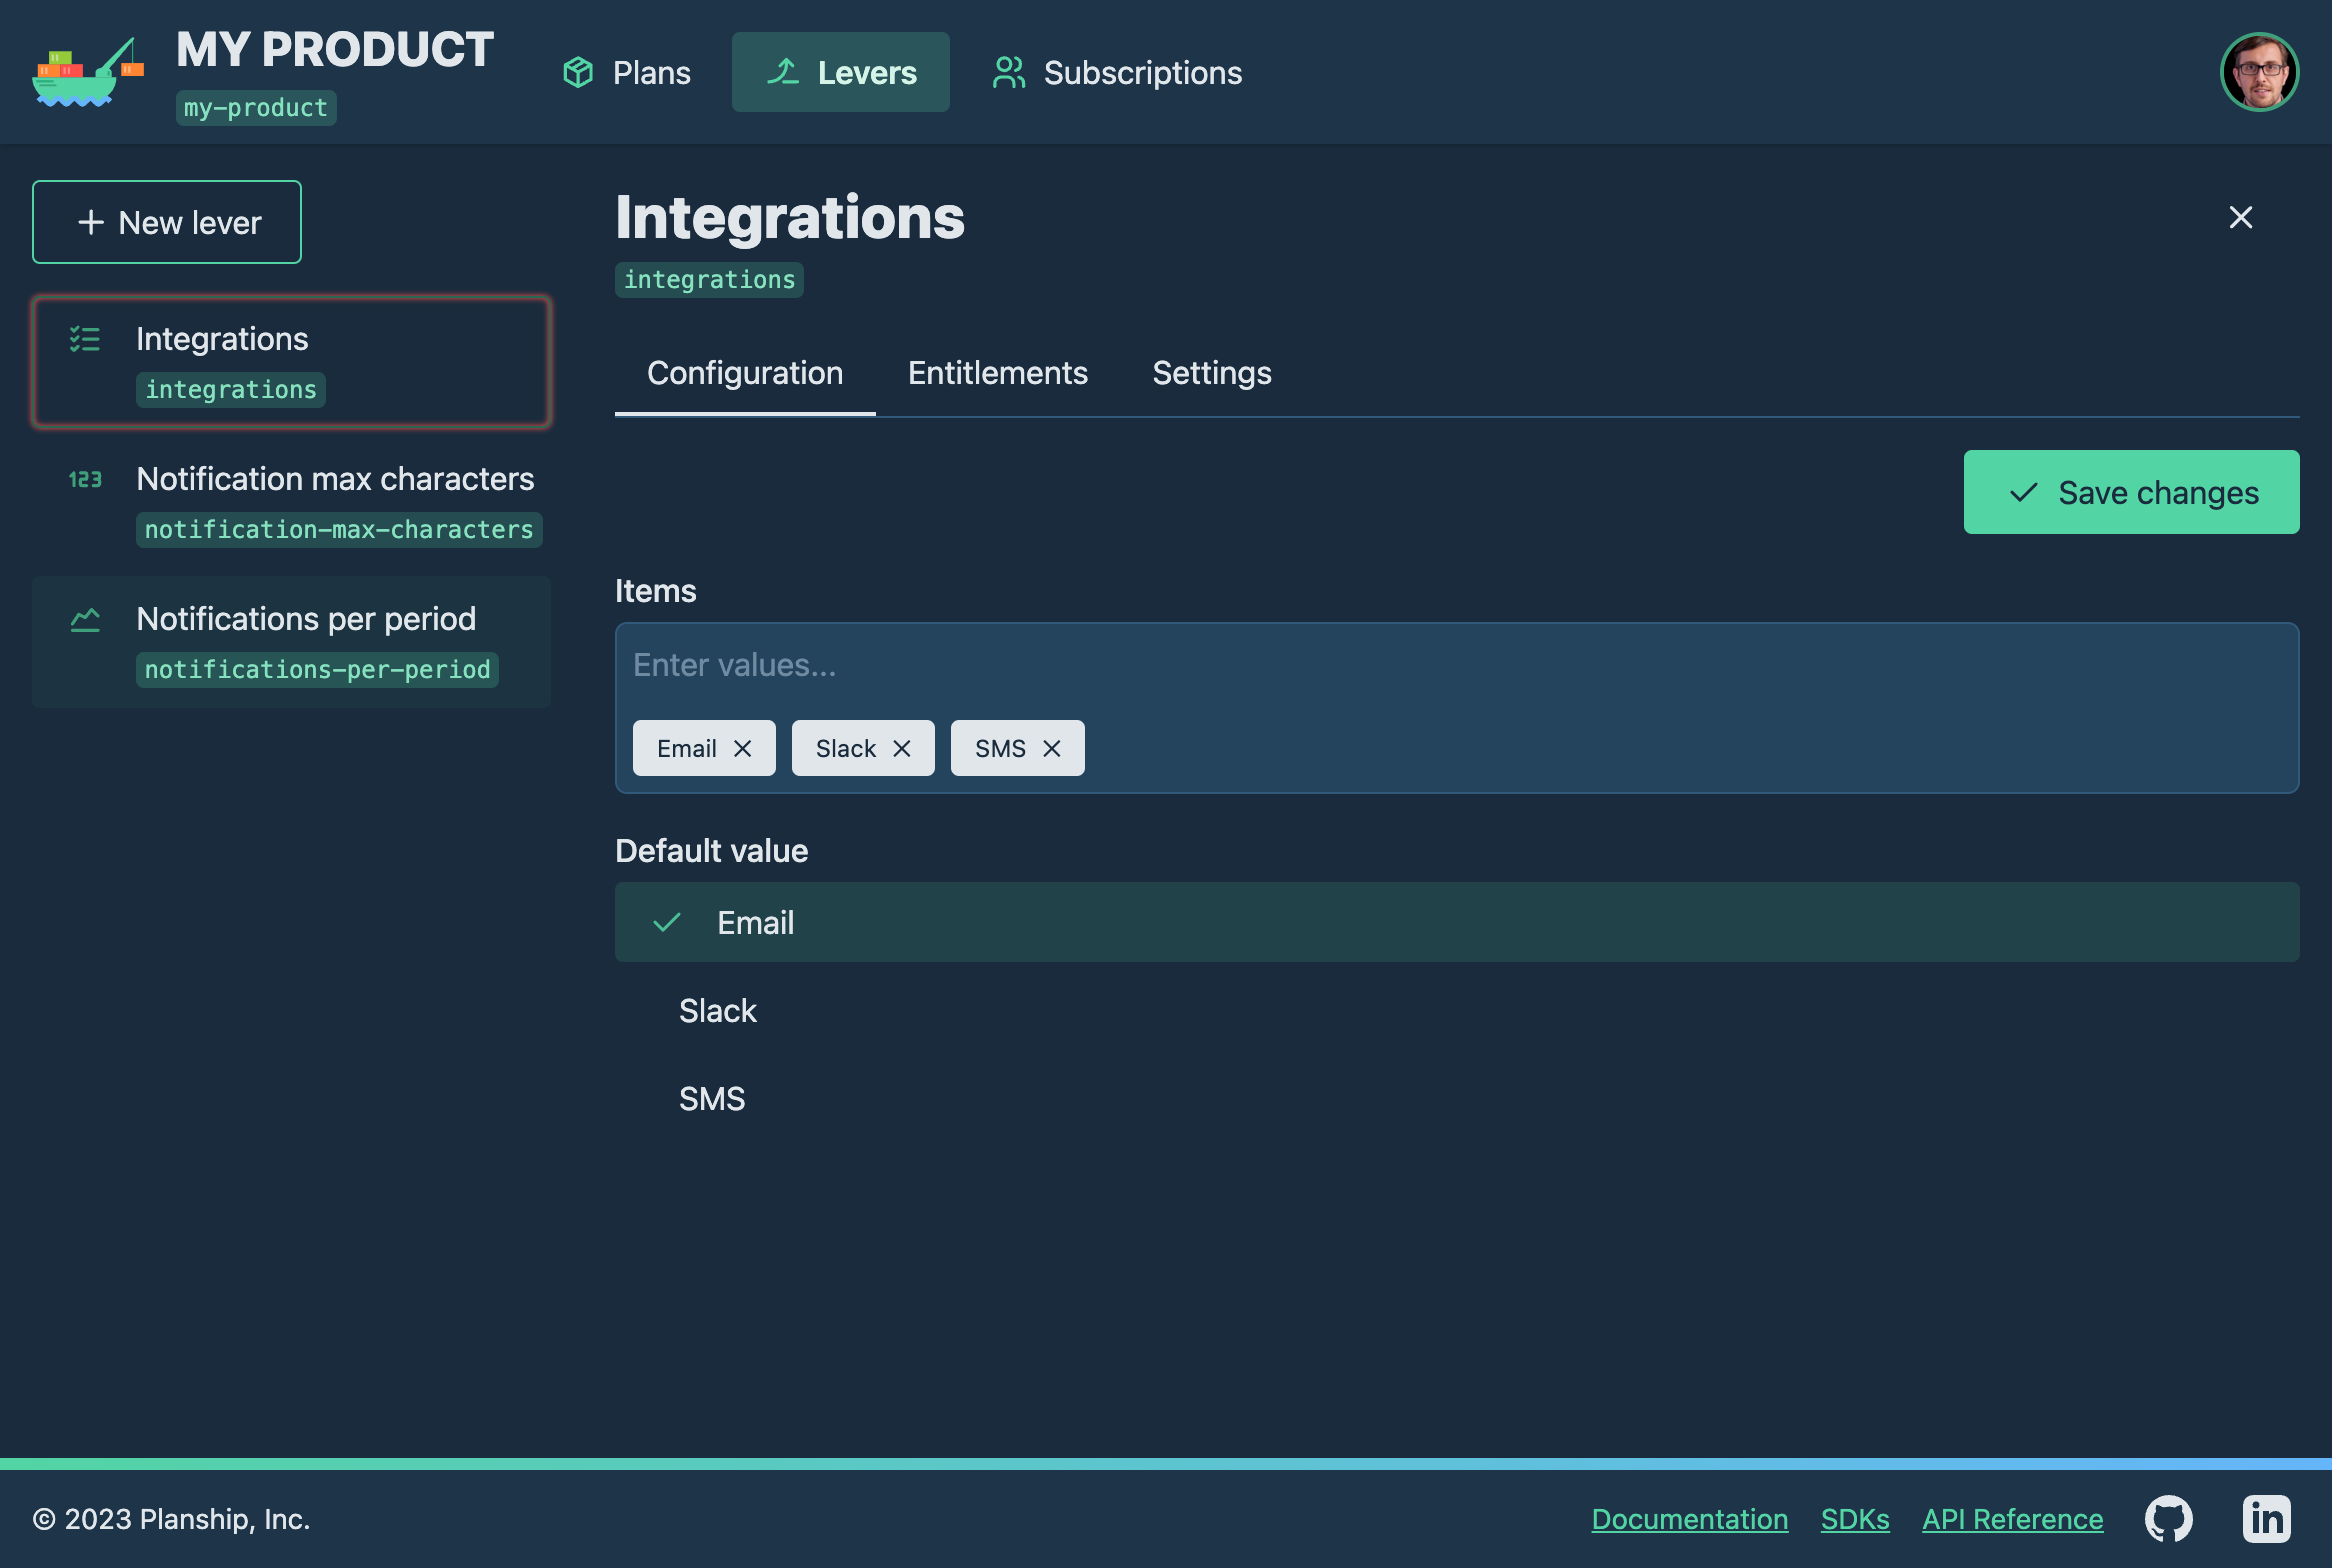
Integrations list feature lever
On the product page, switch to the Levers tab, and click the New lever button. This will open the Create a lever dialog. Enter a name for the new lever (Integrations), and select List as the lever type.
Note
Just like the product, the new lever's name will be used by Planship to generate a slug that will become the unique identifier for it in Planship API operations. For instance, lever slugs are used as keys in the entitlements dictionary returned by Planship.
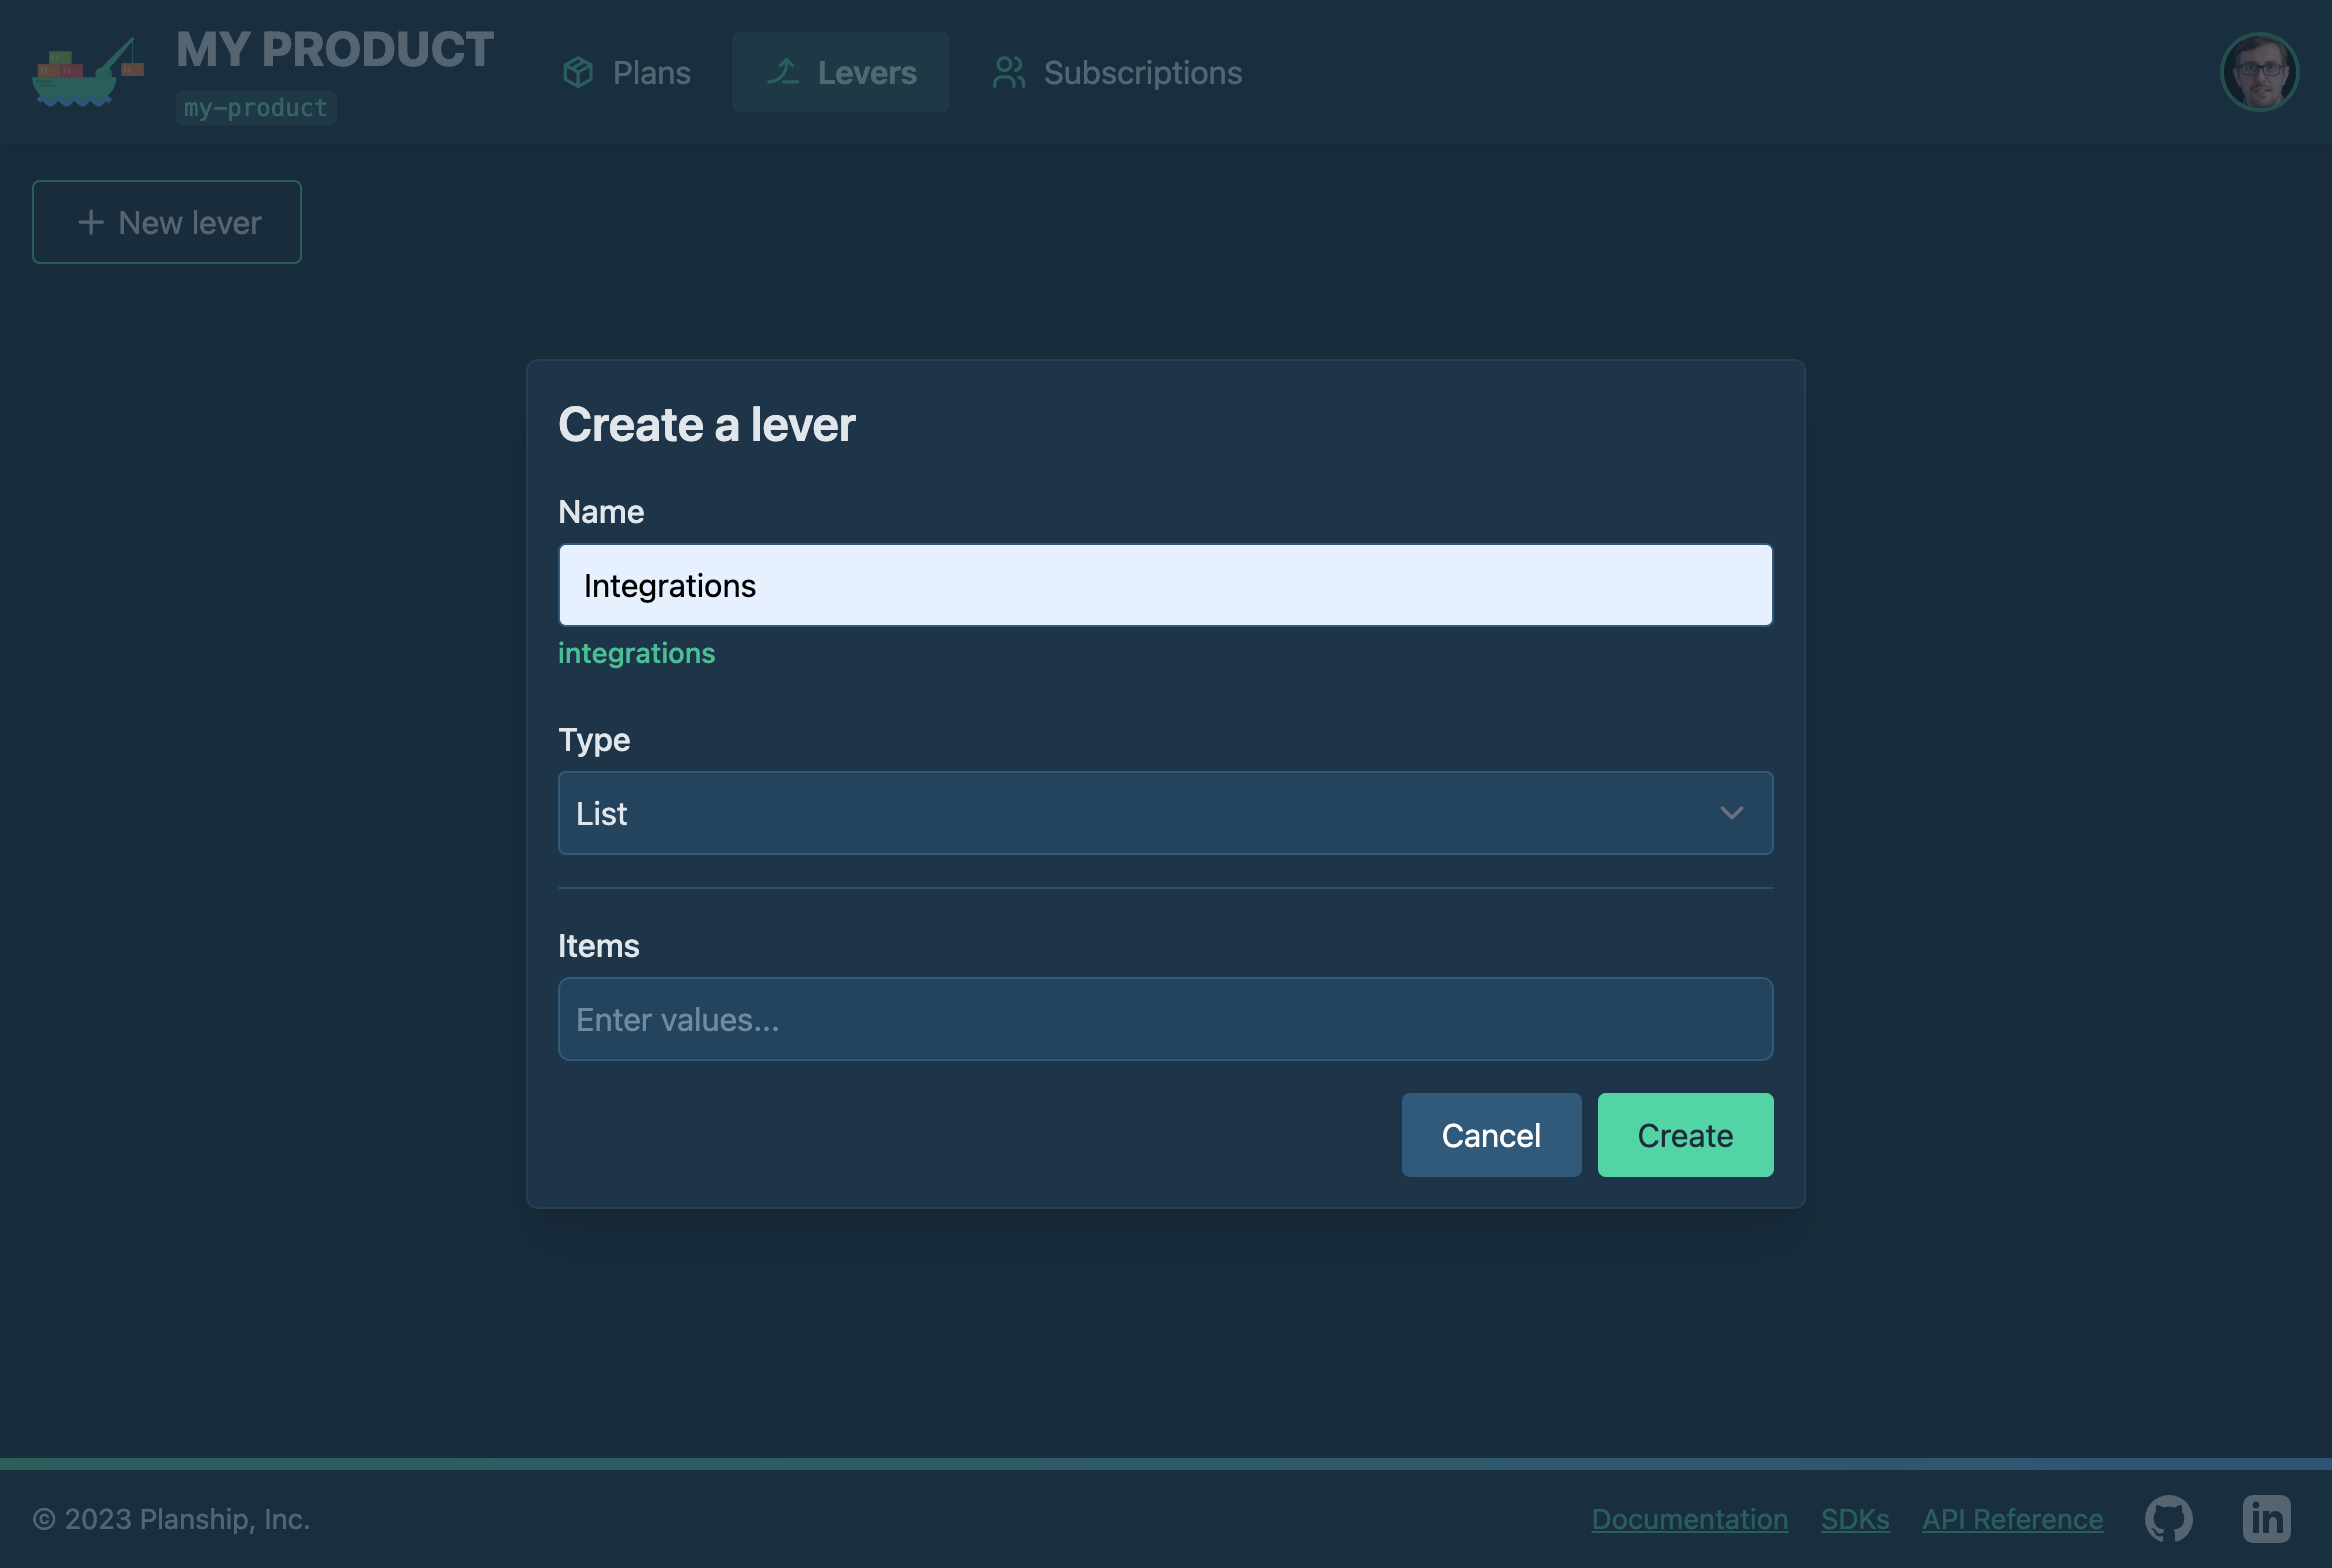
Now it's time to configure the values for the new lever. We chose the list feature type for this Integrations lever because it maps to a product feature best represented by a list of strings (E.g. ['Email', 'Slack'] if both Email and Slack integrations are available to a customer). Add all supported values (Email, Slack, and SMS) to the Items field, and optionally choose items for the lever's Default value. The default value is applied automatically to all plans without an explicit entitlement that overrides it.
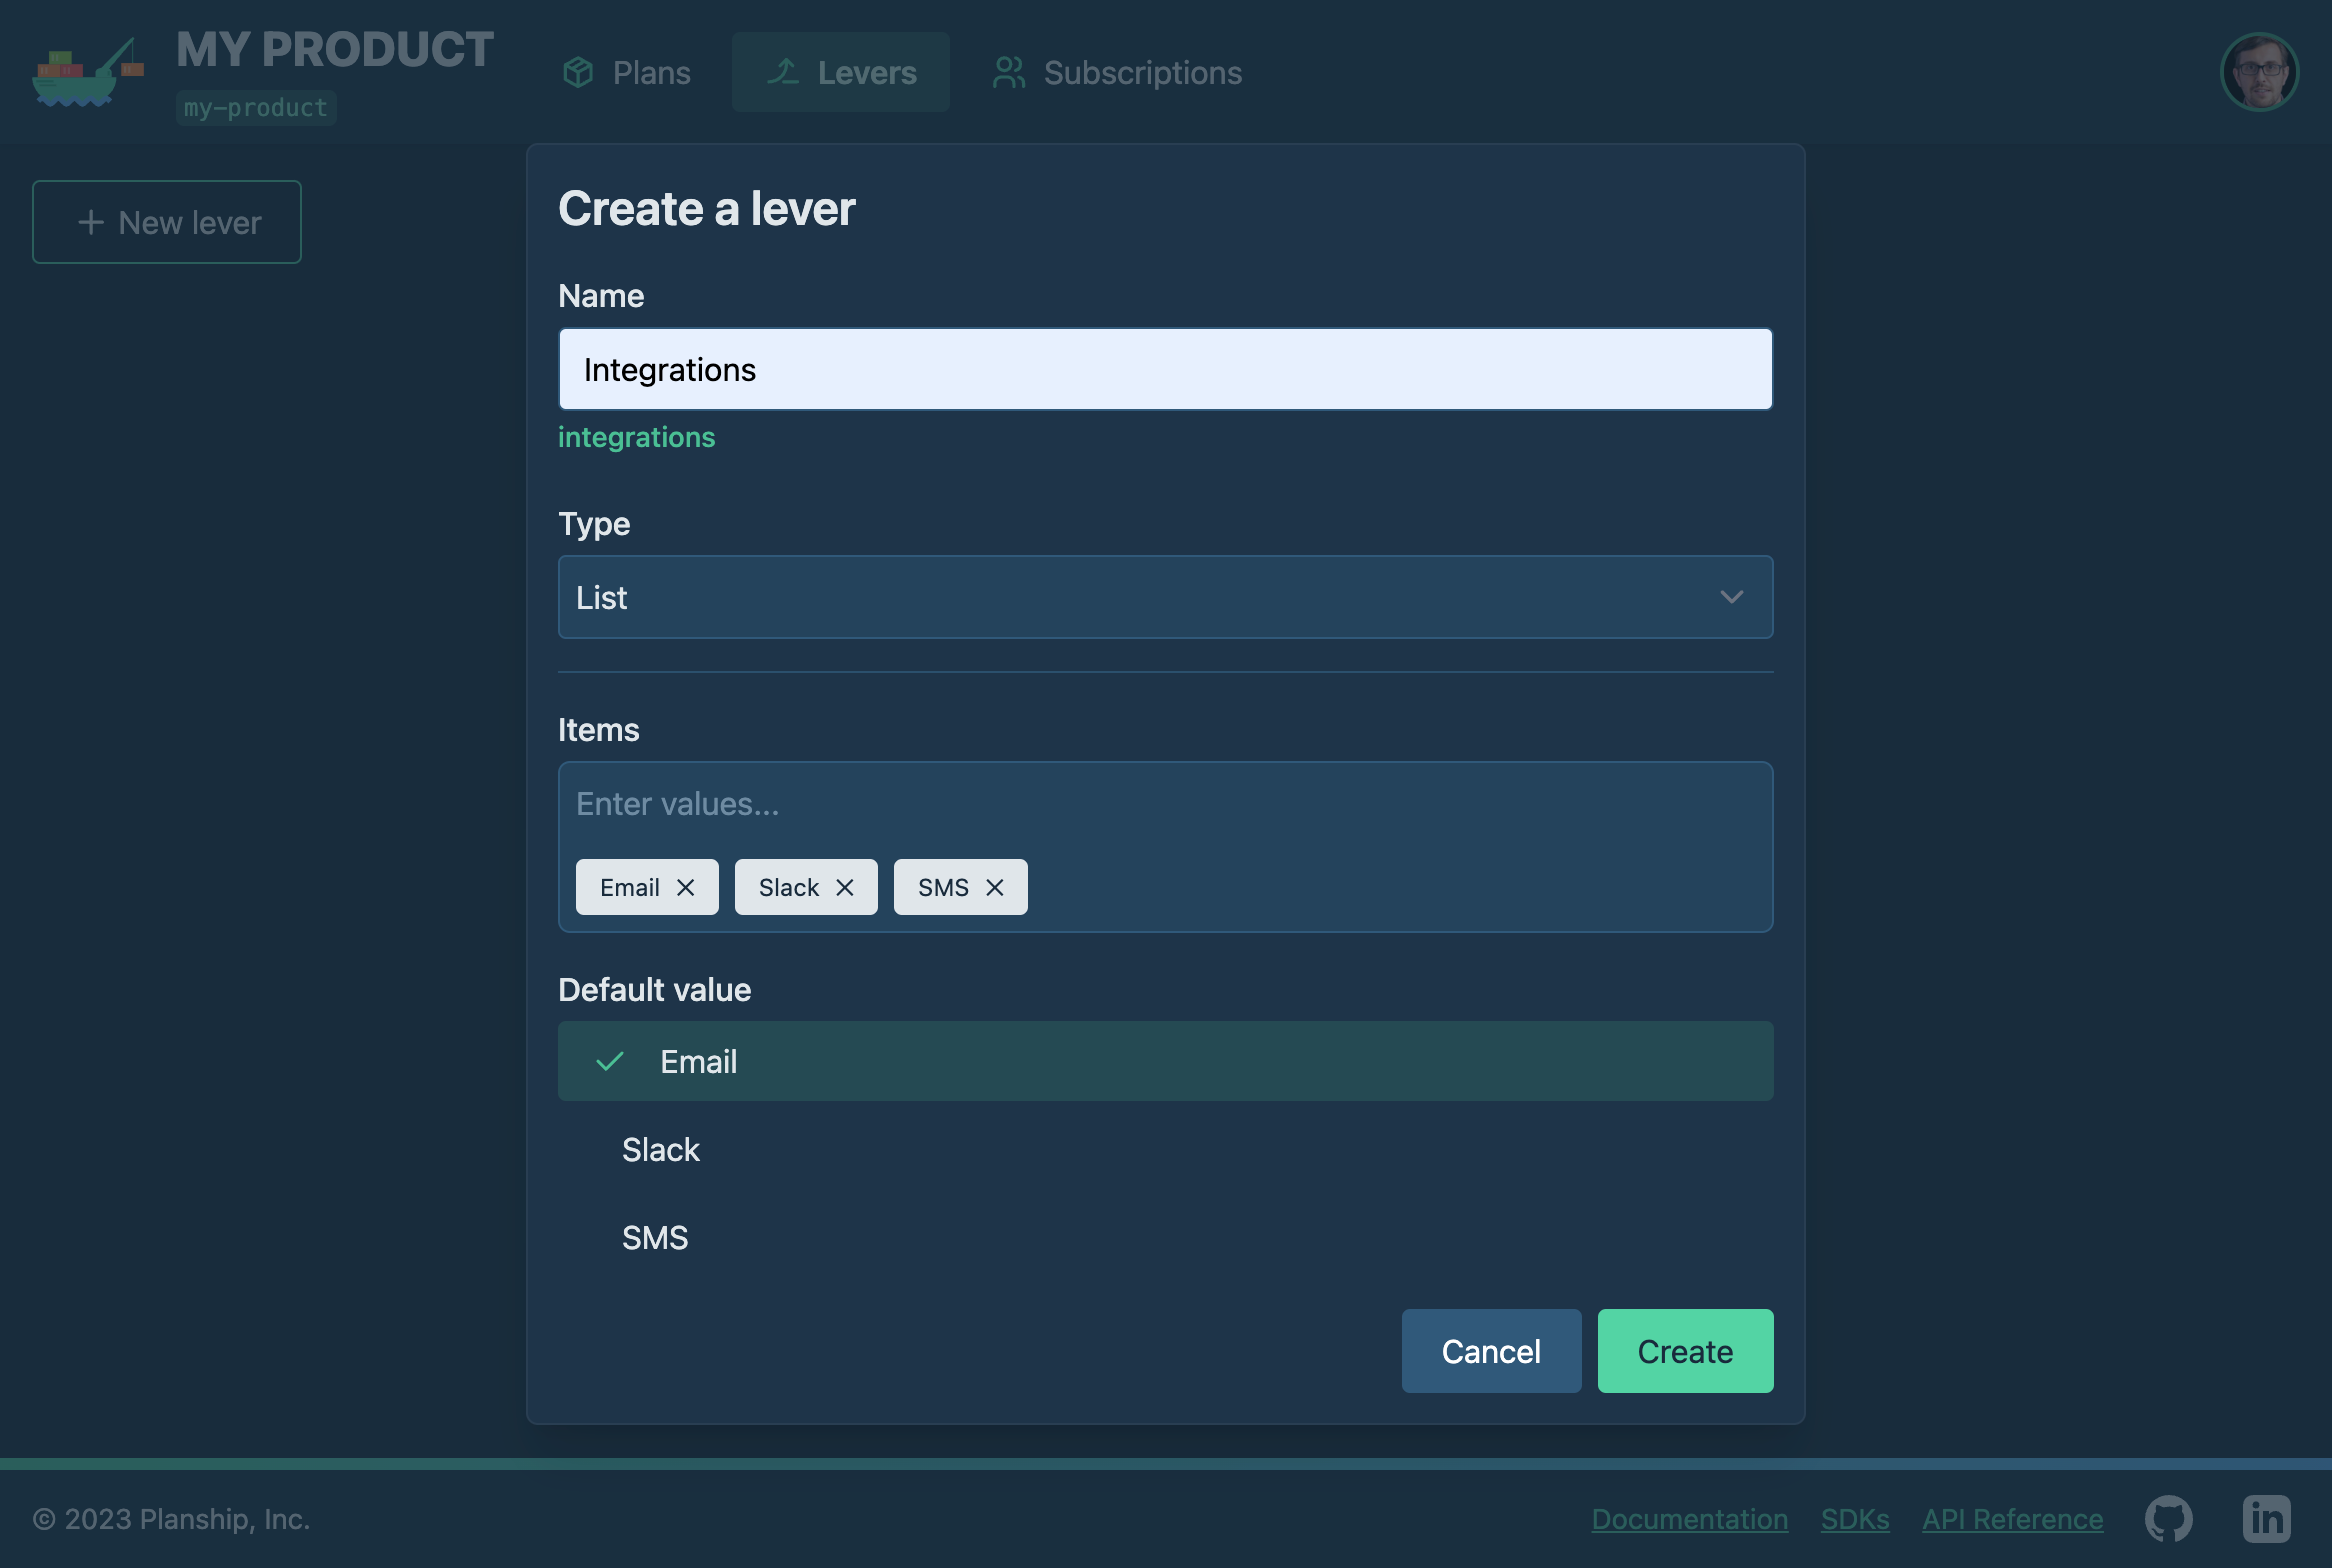
Click the Create button to save the new Integrations lever, and click the New lever button again to repeat the process for the next lever: Notifications per period.
Notifications per period metered usage lever
This time, after choosing a name for the new lever (Notifications per period), we are going to pick Metered as its type. Leave all configuration fields set to their default values, with the exception of the Metering Identifiers field, where we are going to enter notification. In Planship, a Metering ID is an arbitrary string that identifies a unit of raw usage reported to Planship. You can read more about Metering IDs here.
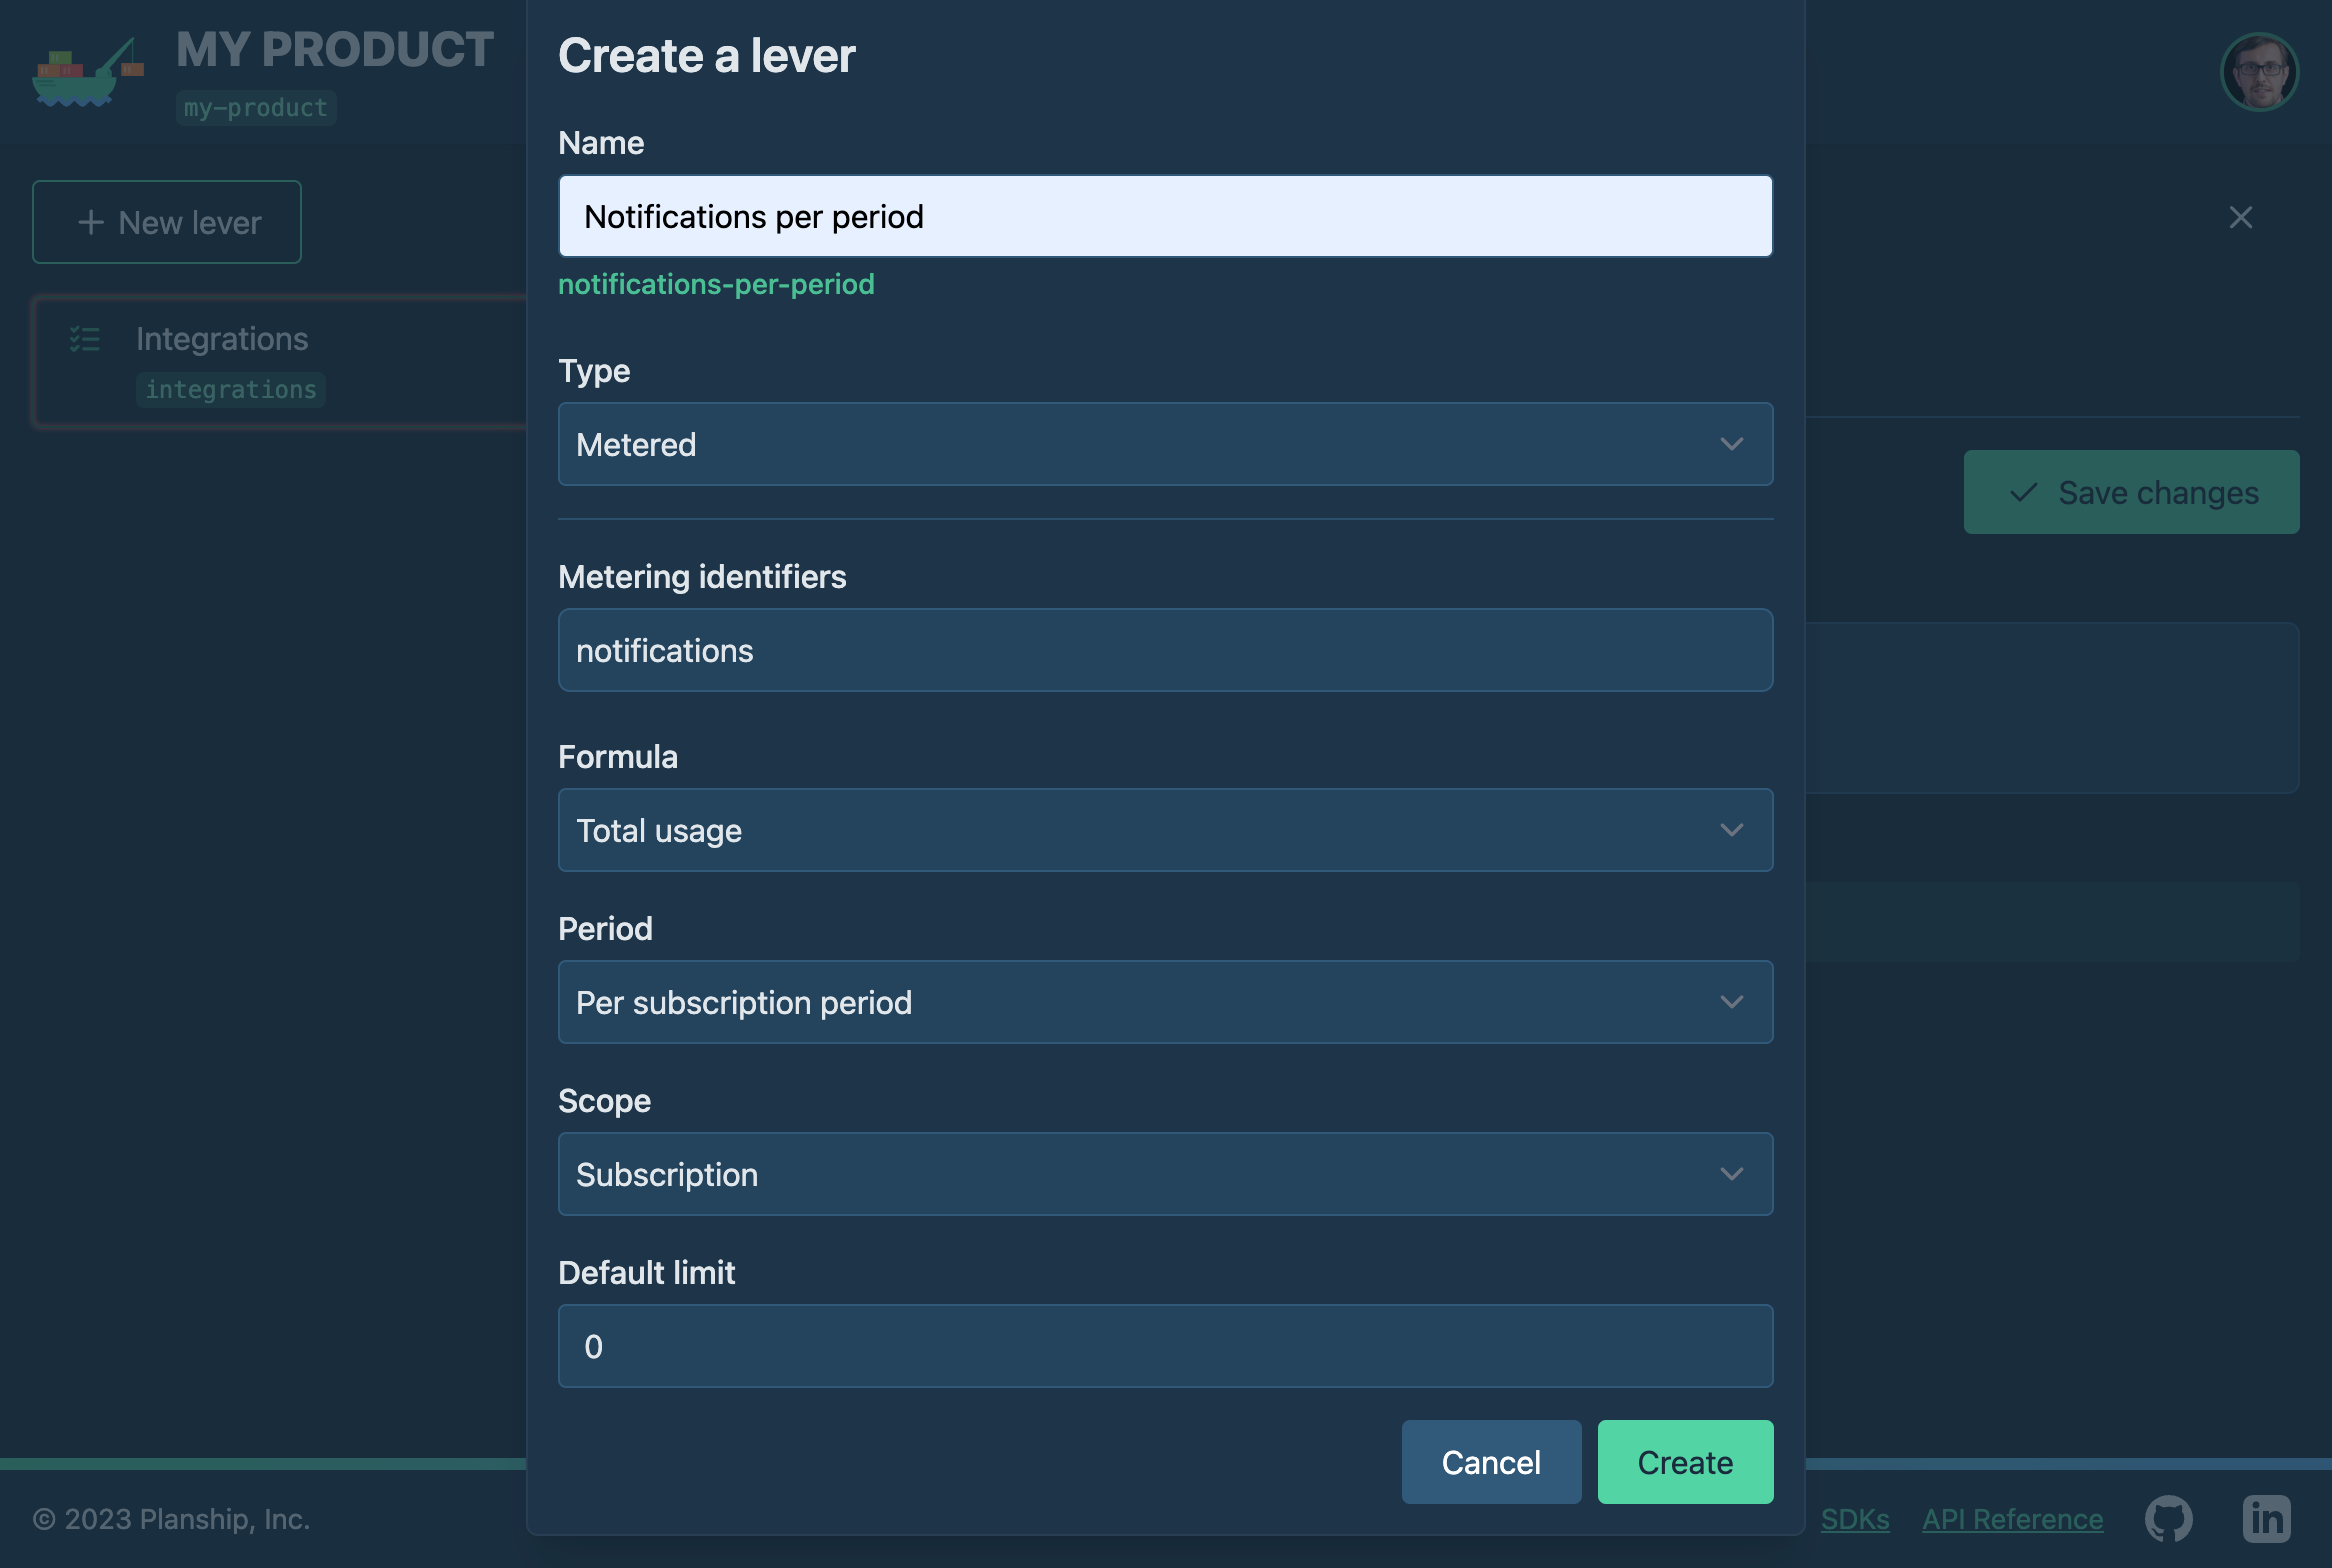
Click the Create button to save changes, and repeat the process for the remaining Notifications max characters lever.
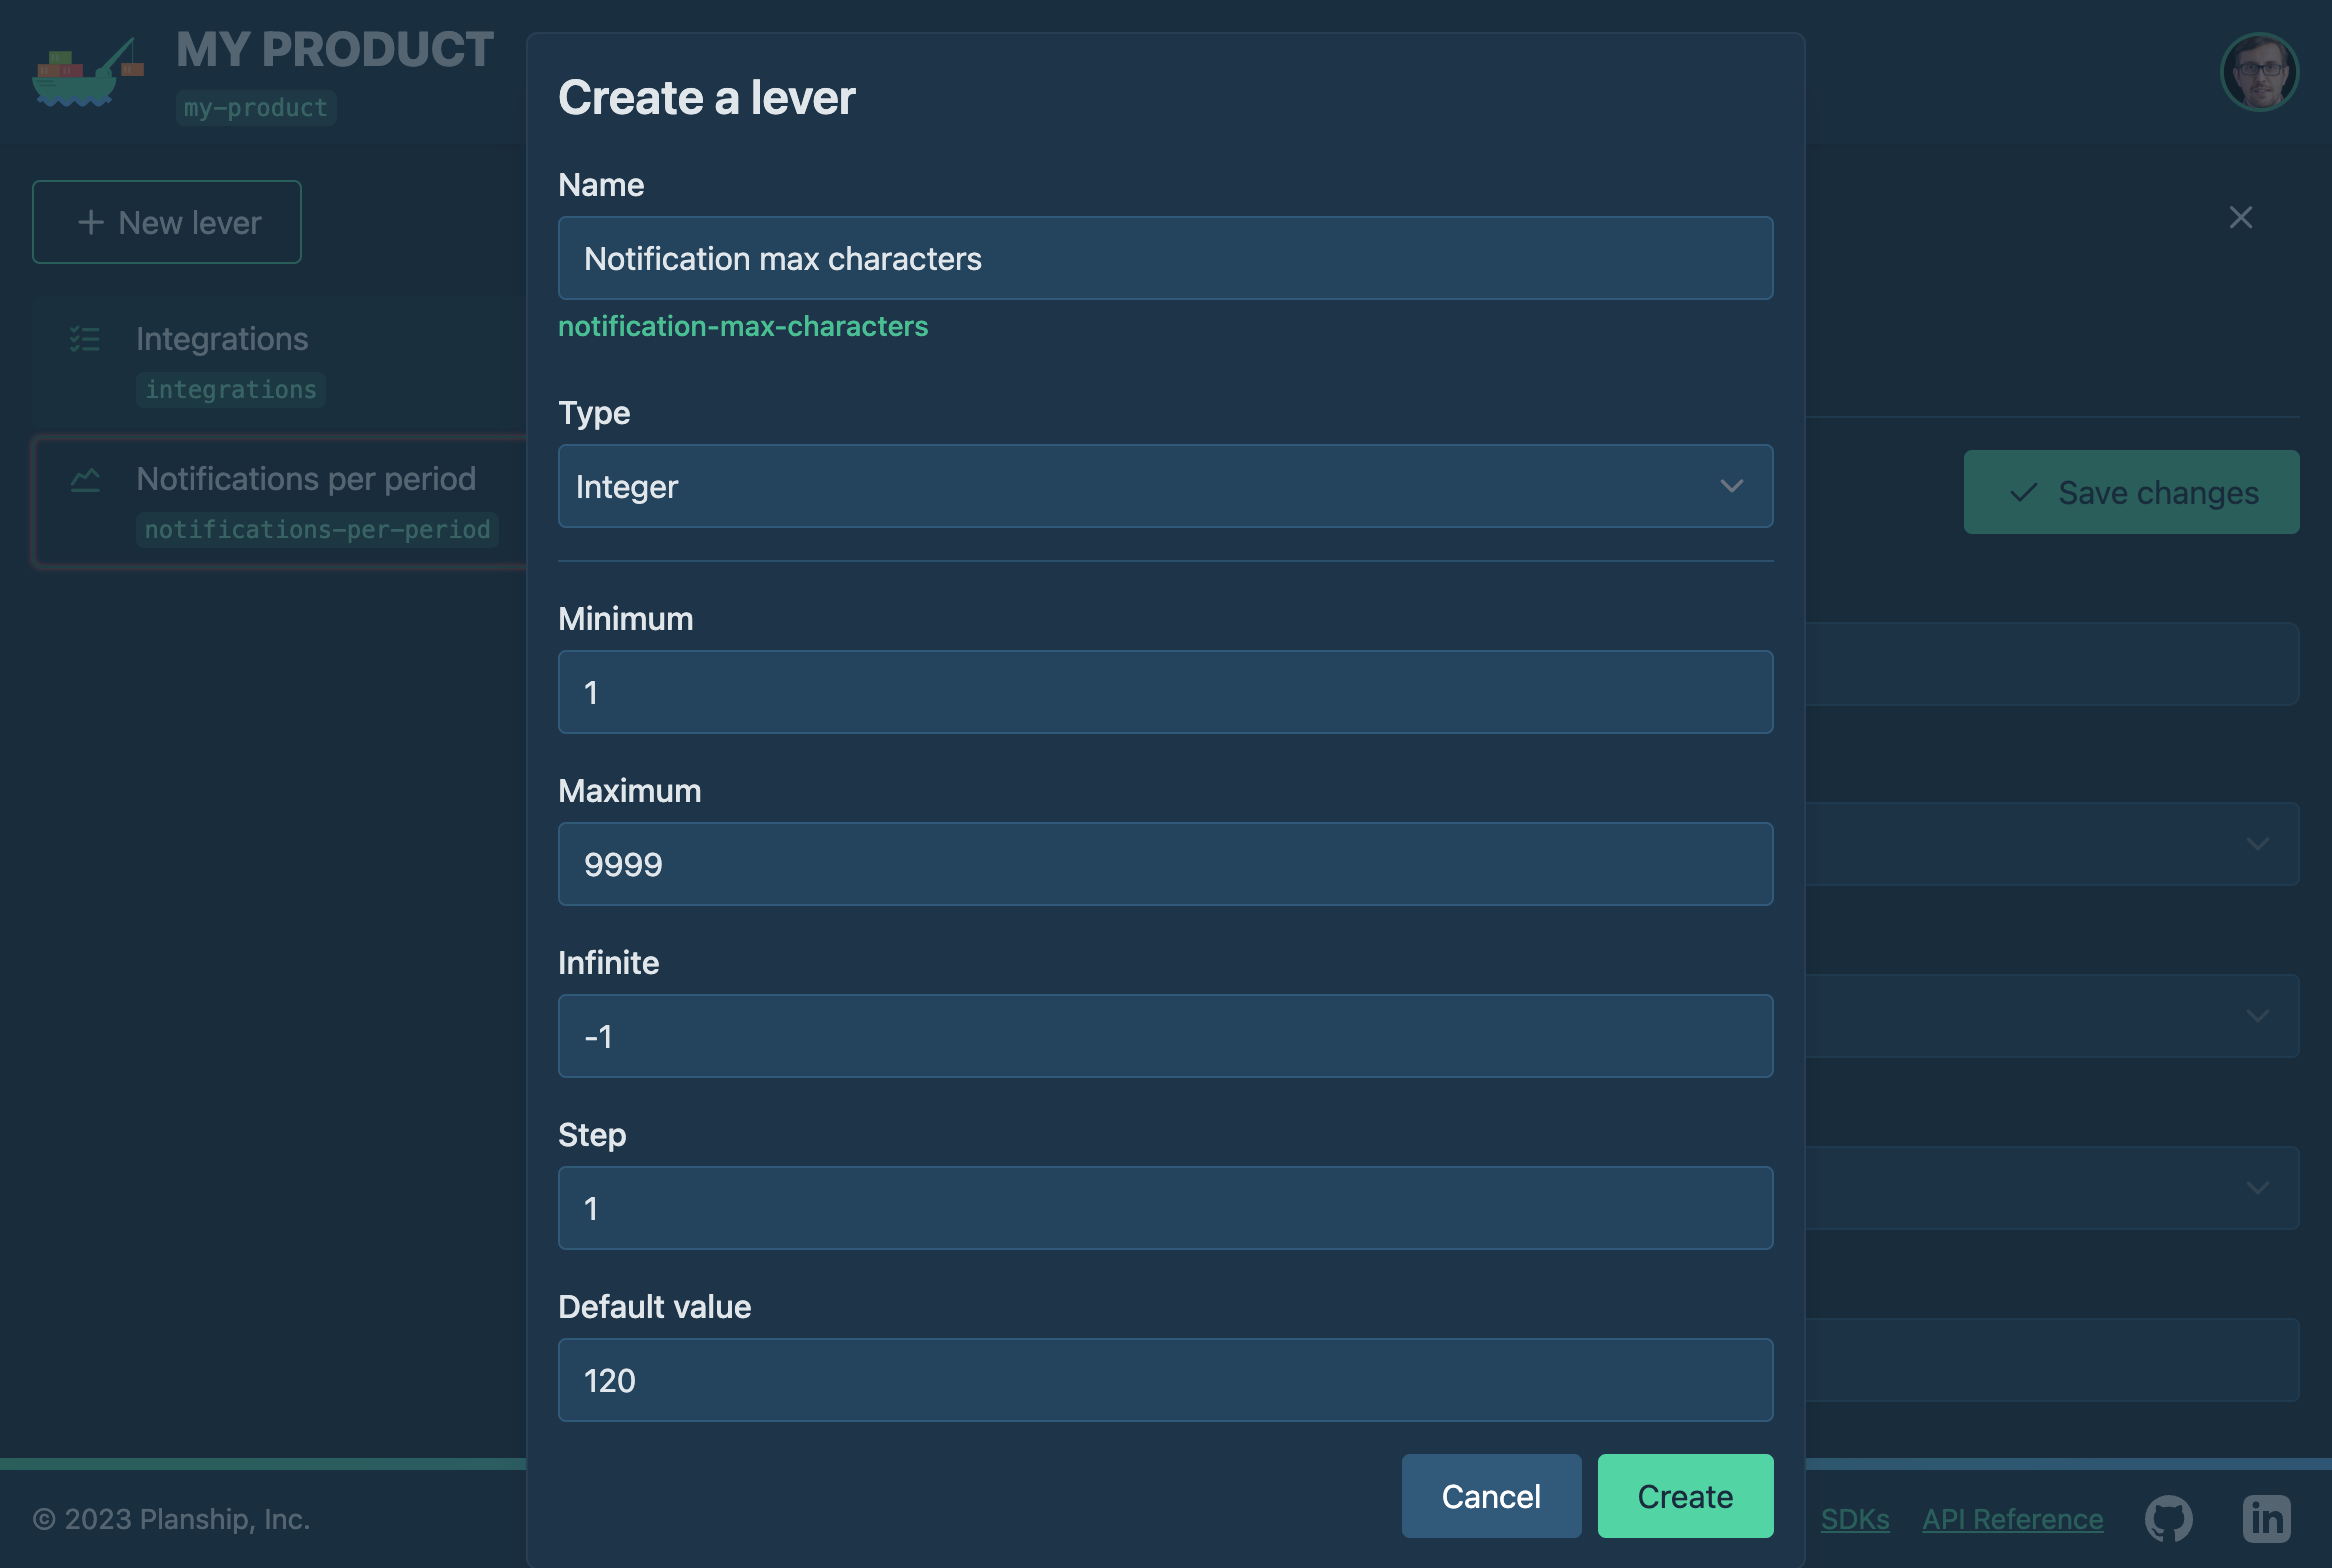
Notifications max characters integer feature lever
Click the New lever button, choose a lever name (Notifications max characters), and pick Integer for its type. This lever represents a numerical limit that we may want enforce in our product code. We are going to leave all of the configuration fields set to their defaults except for the Default value, which we'll set to 120.
Click the Create button to save changes. Now we're ready to define plans and configure entitlements.
Creating plans
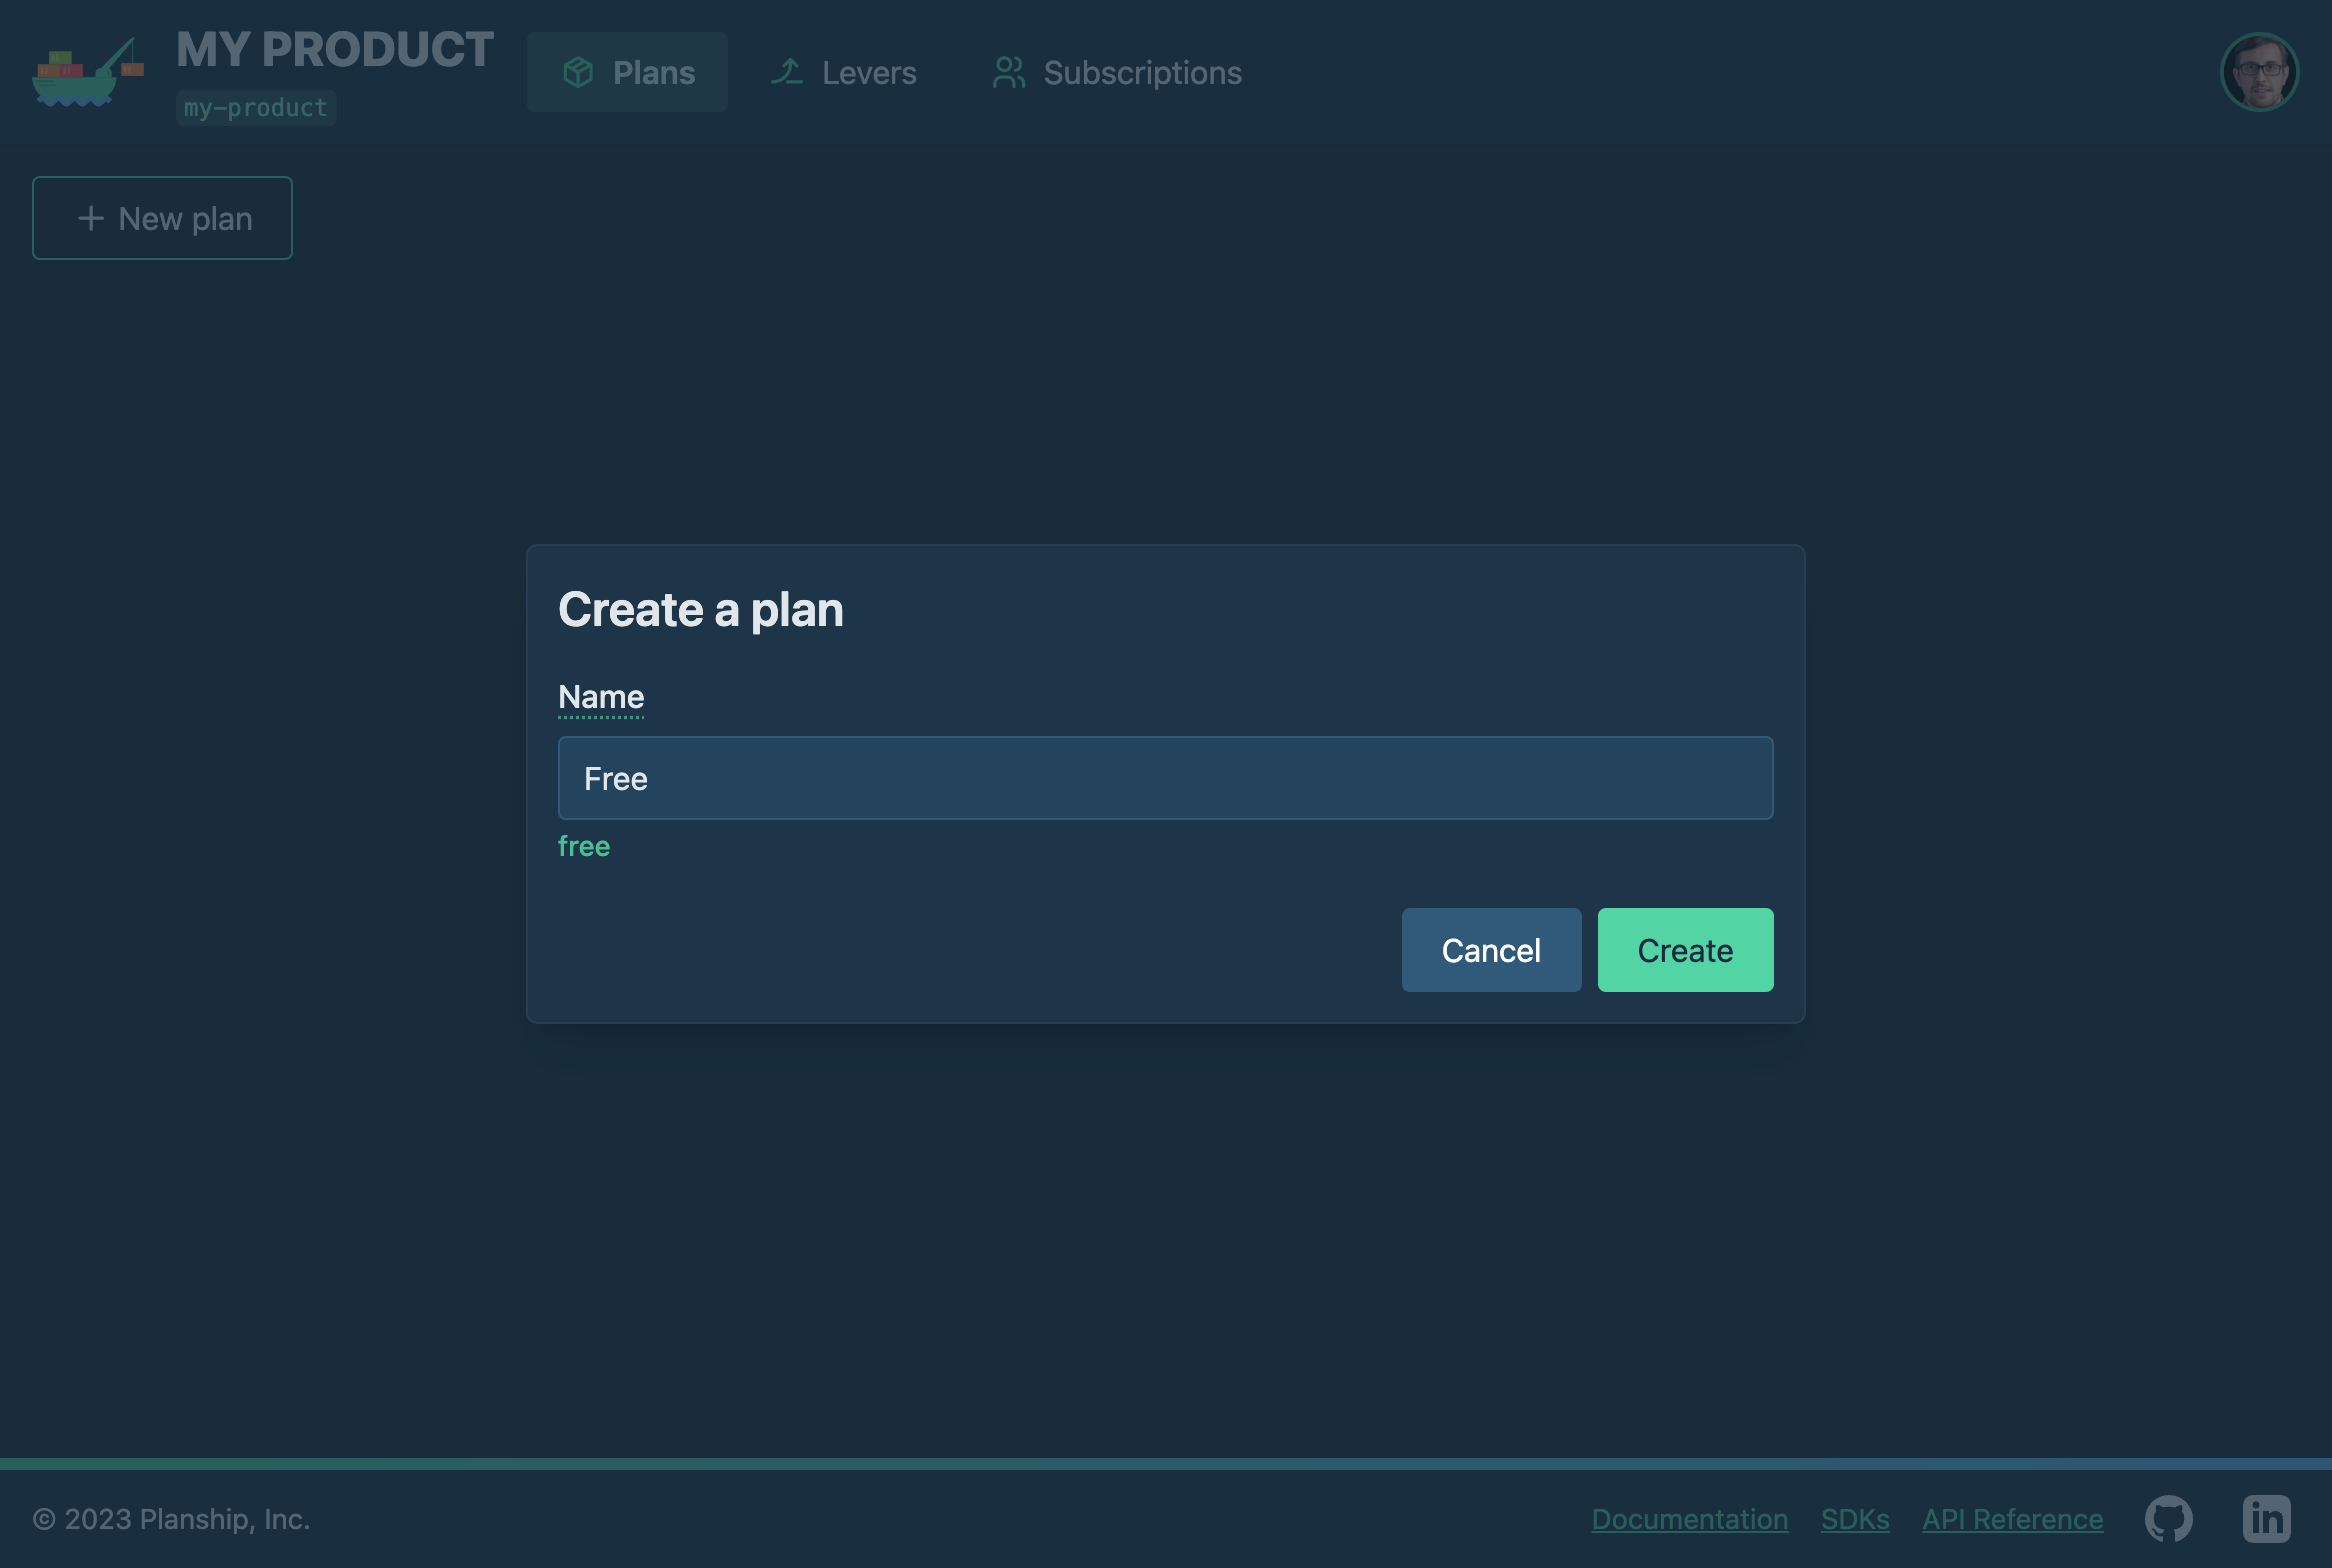
Switch to the Plans tab, and click the New plan button. Enter 'Free' as the plan name, and click the Create button to create it.
Free plan
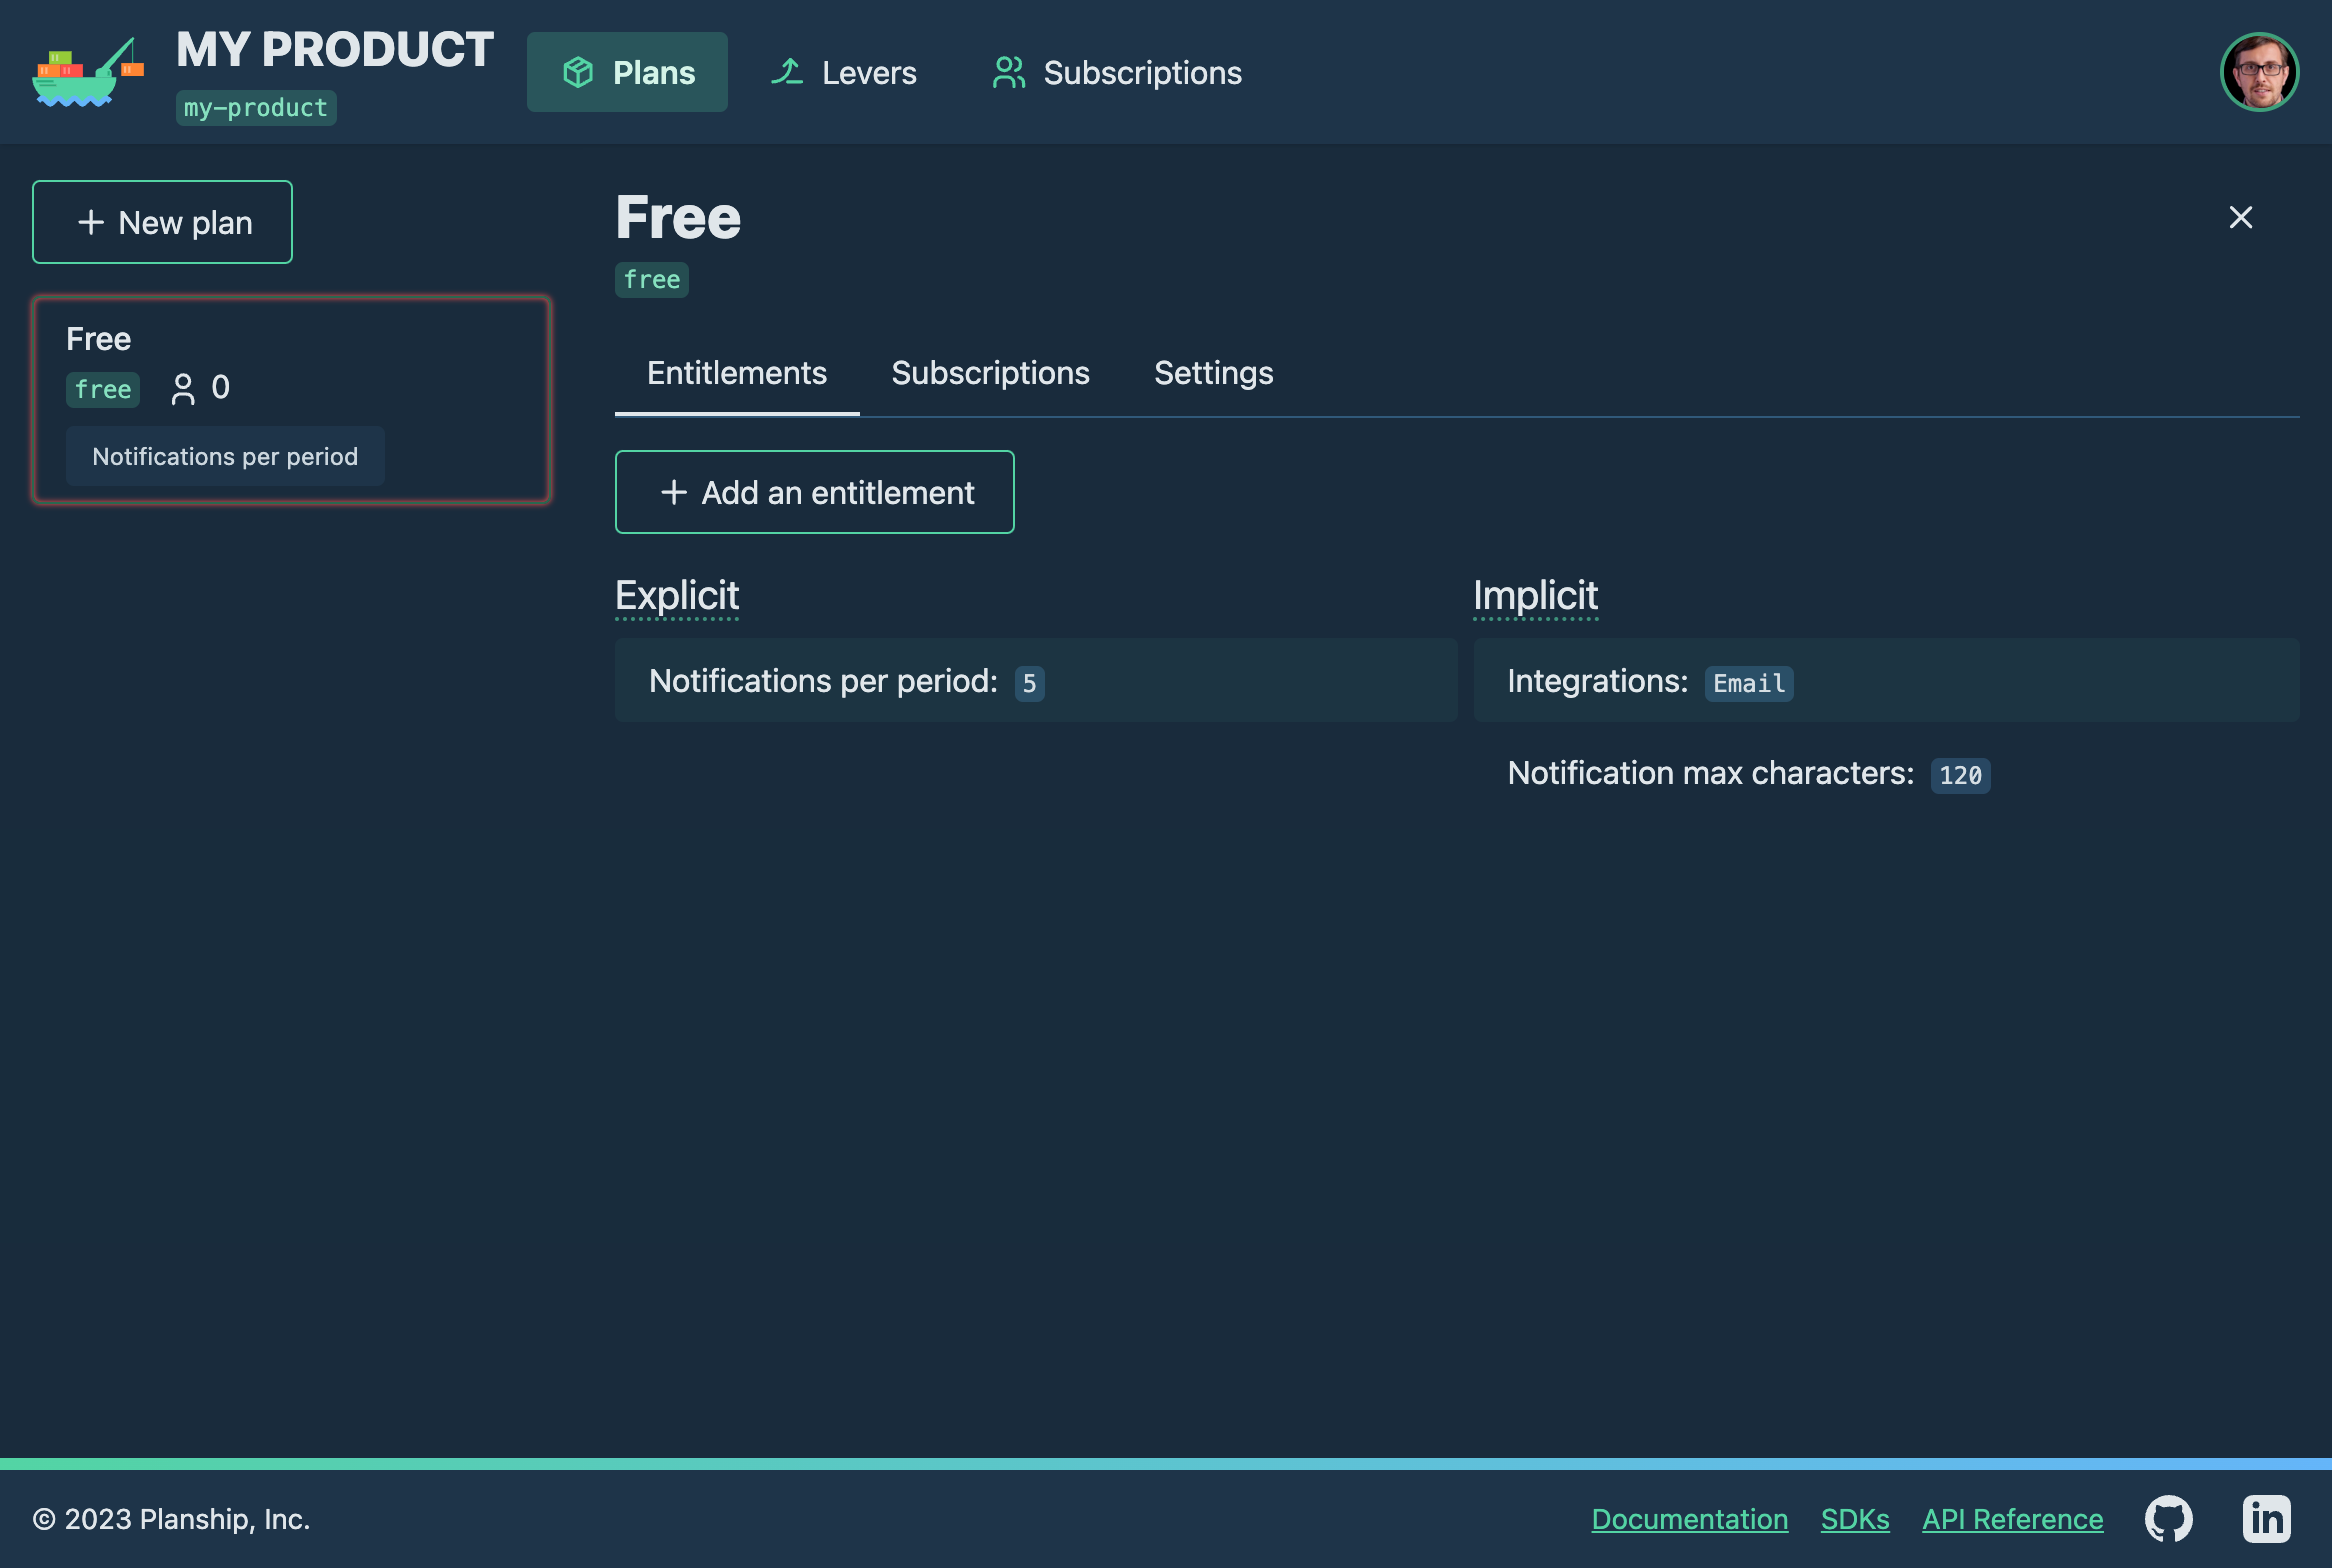
We should now see the Entitlements tab of the newly created Free plan. Since we haven't defined any feature or metered entitlements for this plan explicitly, it only has implicit entitlements that come from the default values of the levers that we defined earlier:
- Integrations:
Email - Notification max characters:
120 - Notifications per period:
0
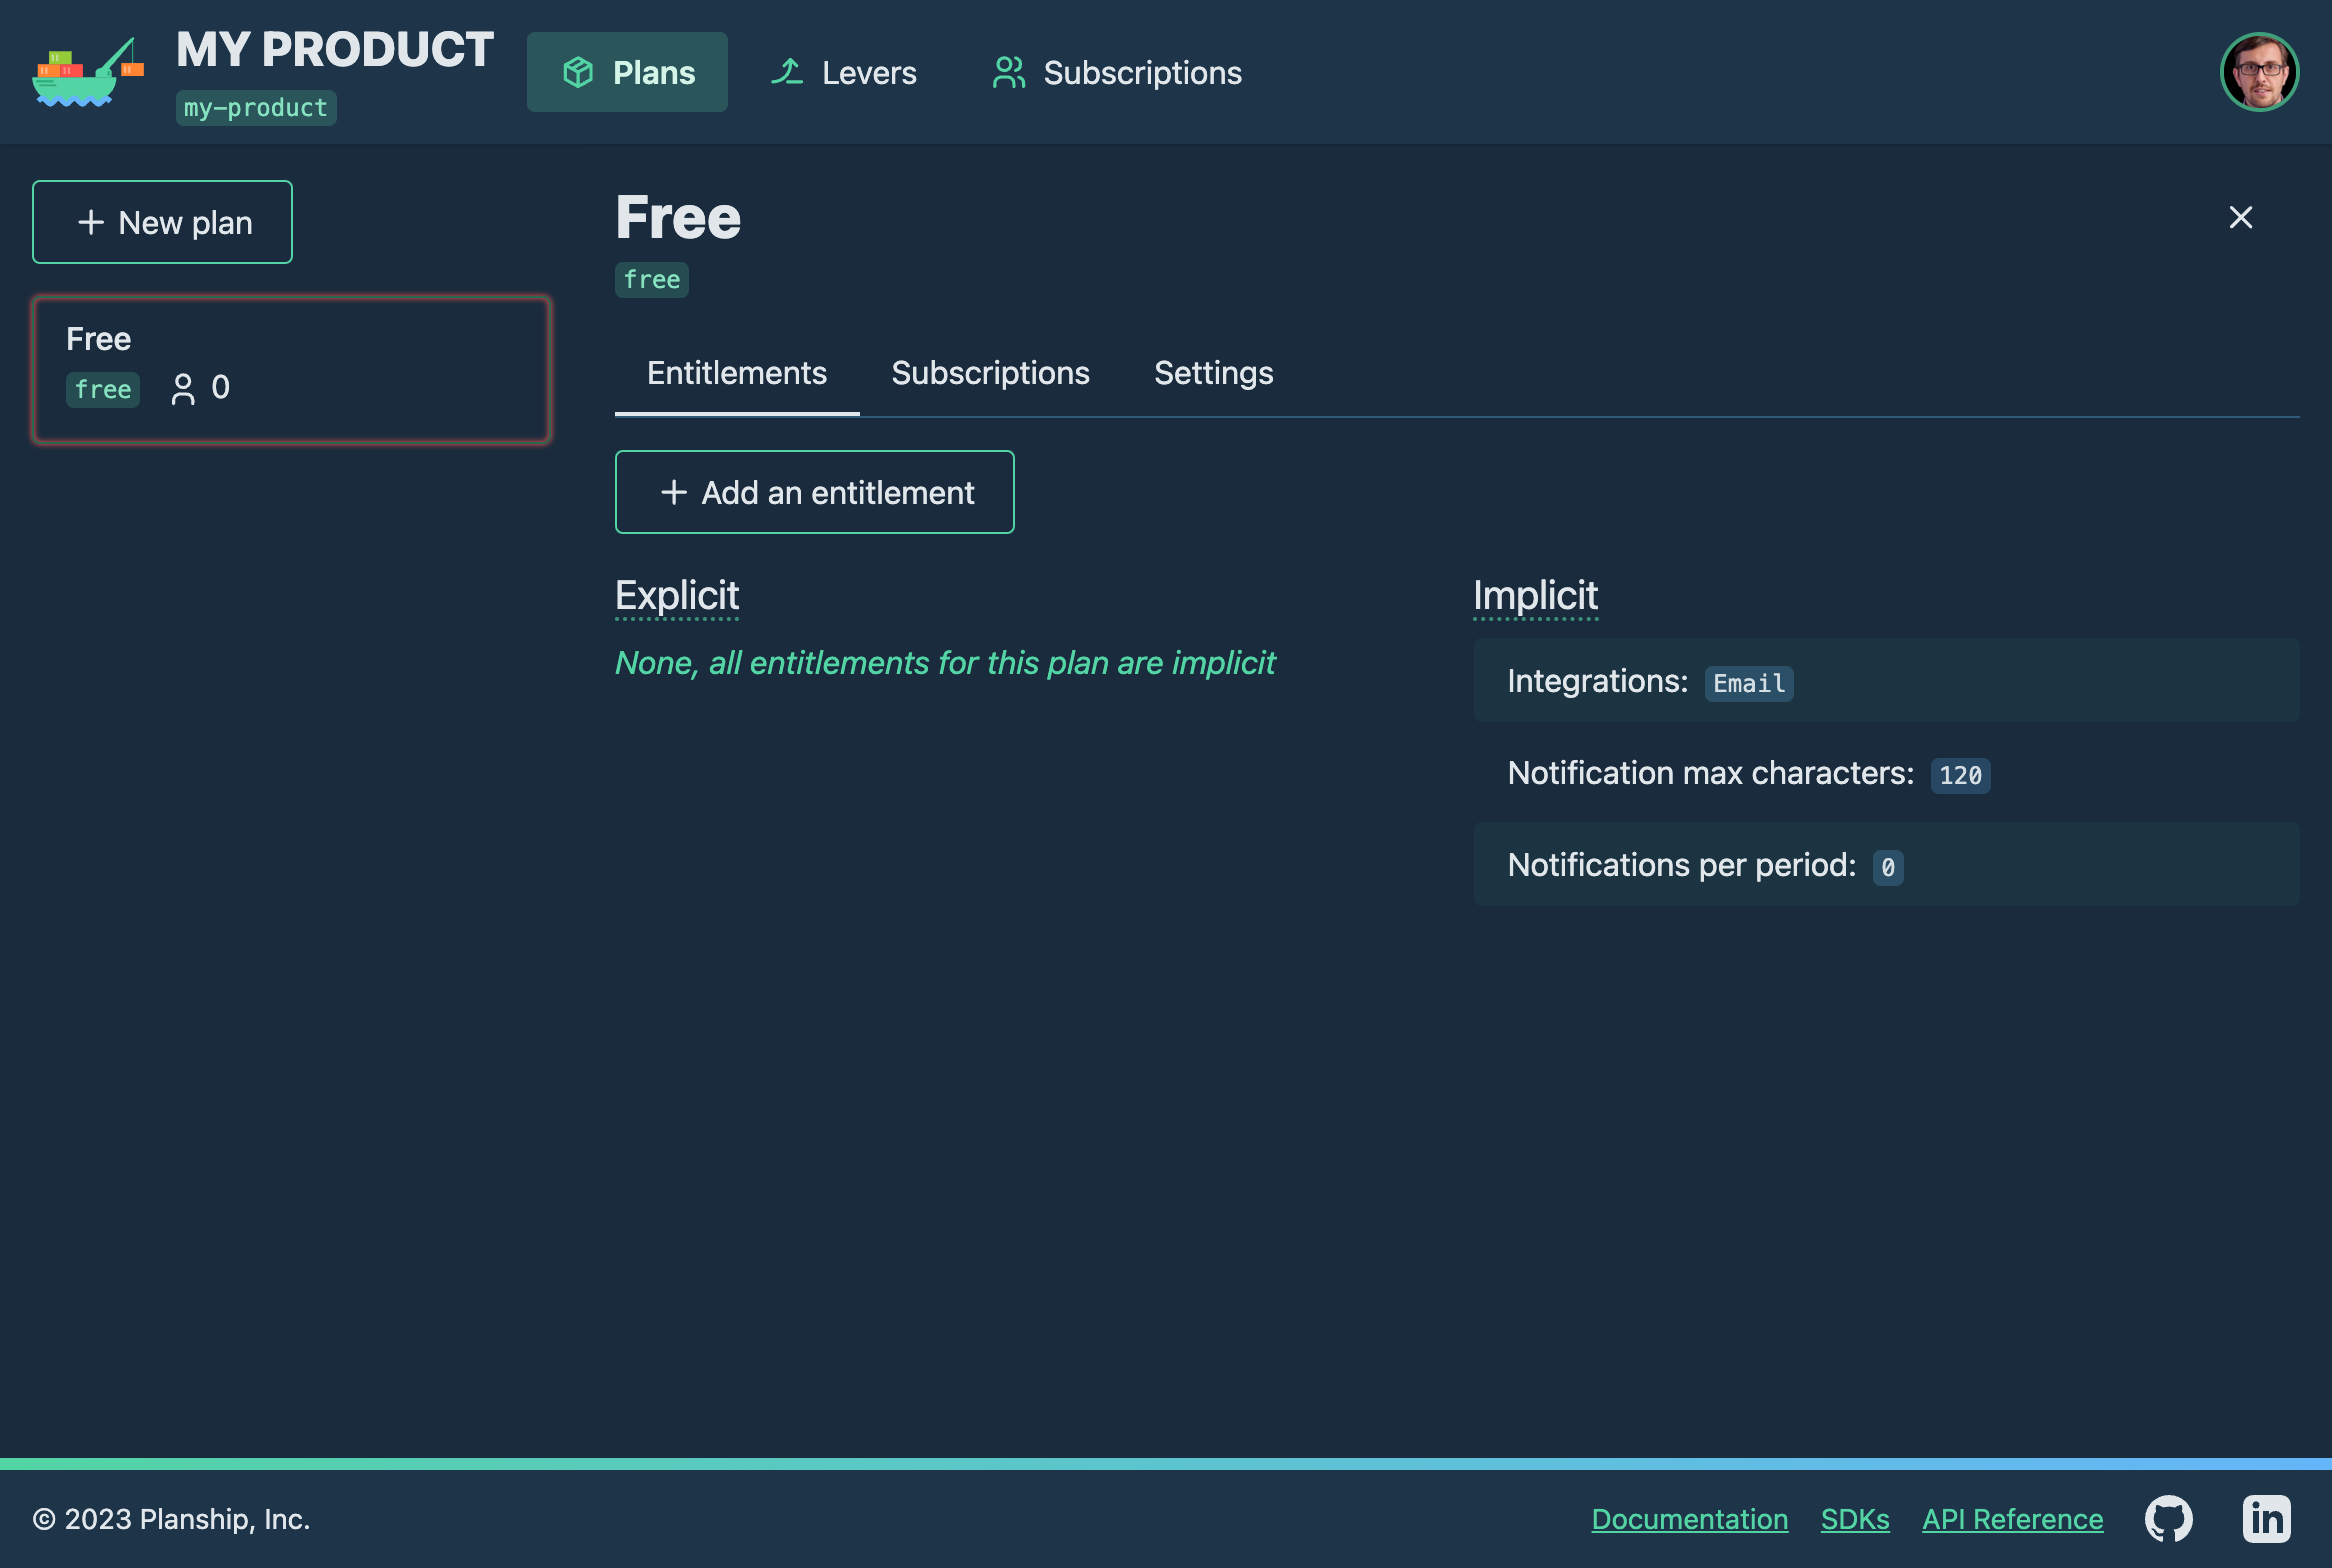
While the Integrations and Notification max characters entitlement values are identical to what we intended for the Free plan, Notifications per period entitlement value is not; it should be 5 notificatons per period instead of 0. To change the value we need to to create an explicit entitlement for the Notifications per period lever.
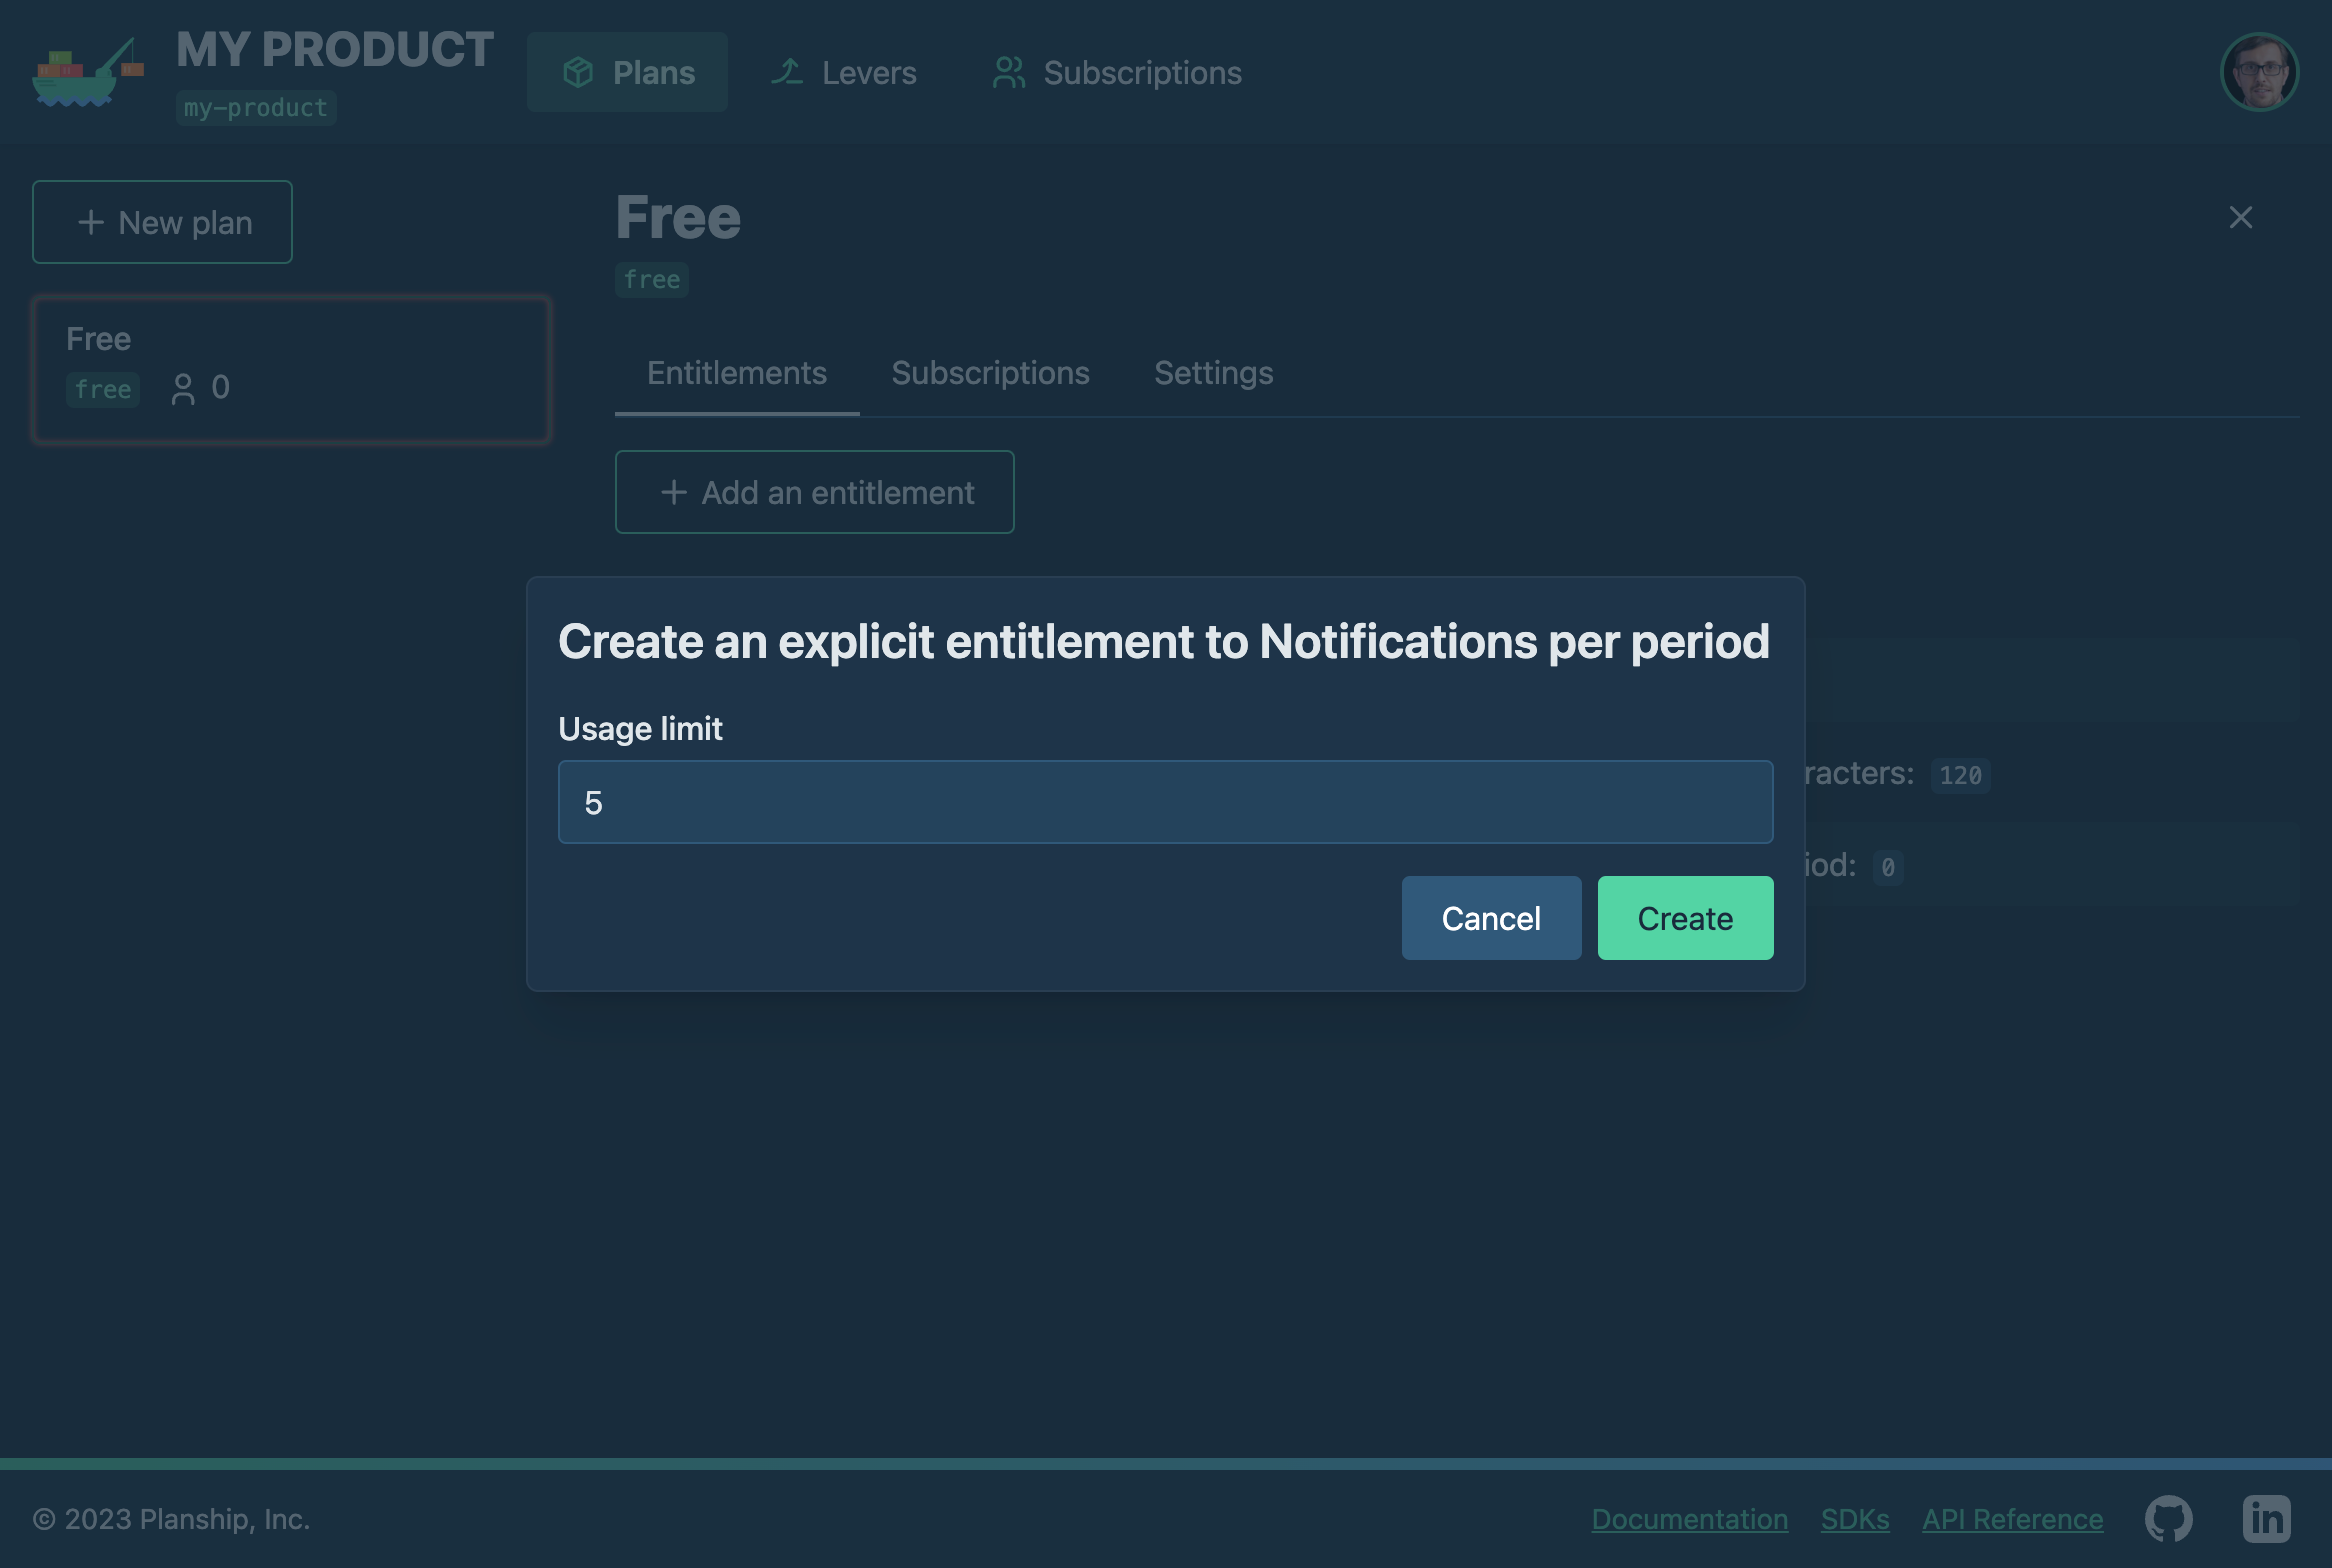
Click the Notifications per period implicit entitlement to open the Create an explicit entitlement dialog, change the Usage limit value to 5, and click the Create button to save the entitlement.
Before we move on to create and configure our two remaining plans, let's make sure that the Free plan has correct subscription renewal settings. Switch to the Settings tab and review the value of the Auto renew, Auto renew plan, and Duration fields. By default, they should be set to True, Free, and 1 month respectively. This means that all subscriptions to this plan will automatically renew to the Free plan every month unless they are configured otherwise.

Personal and Team plans
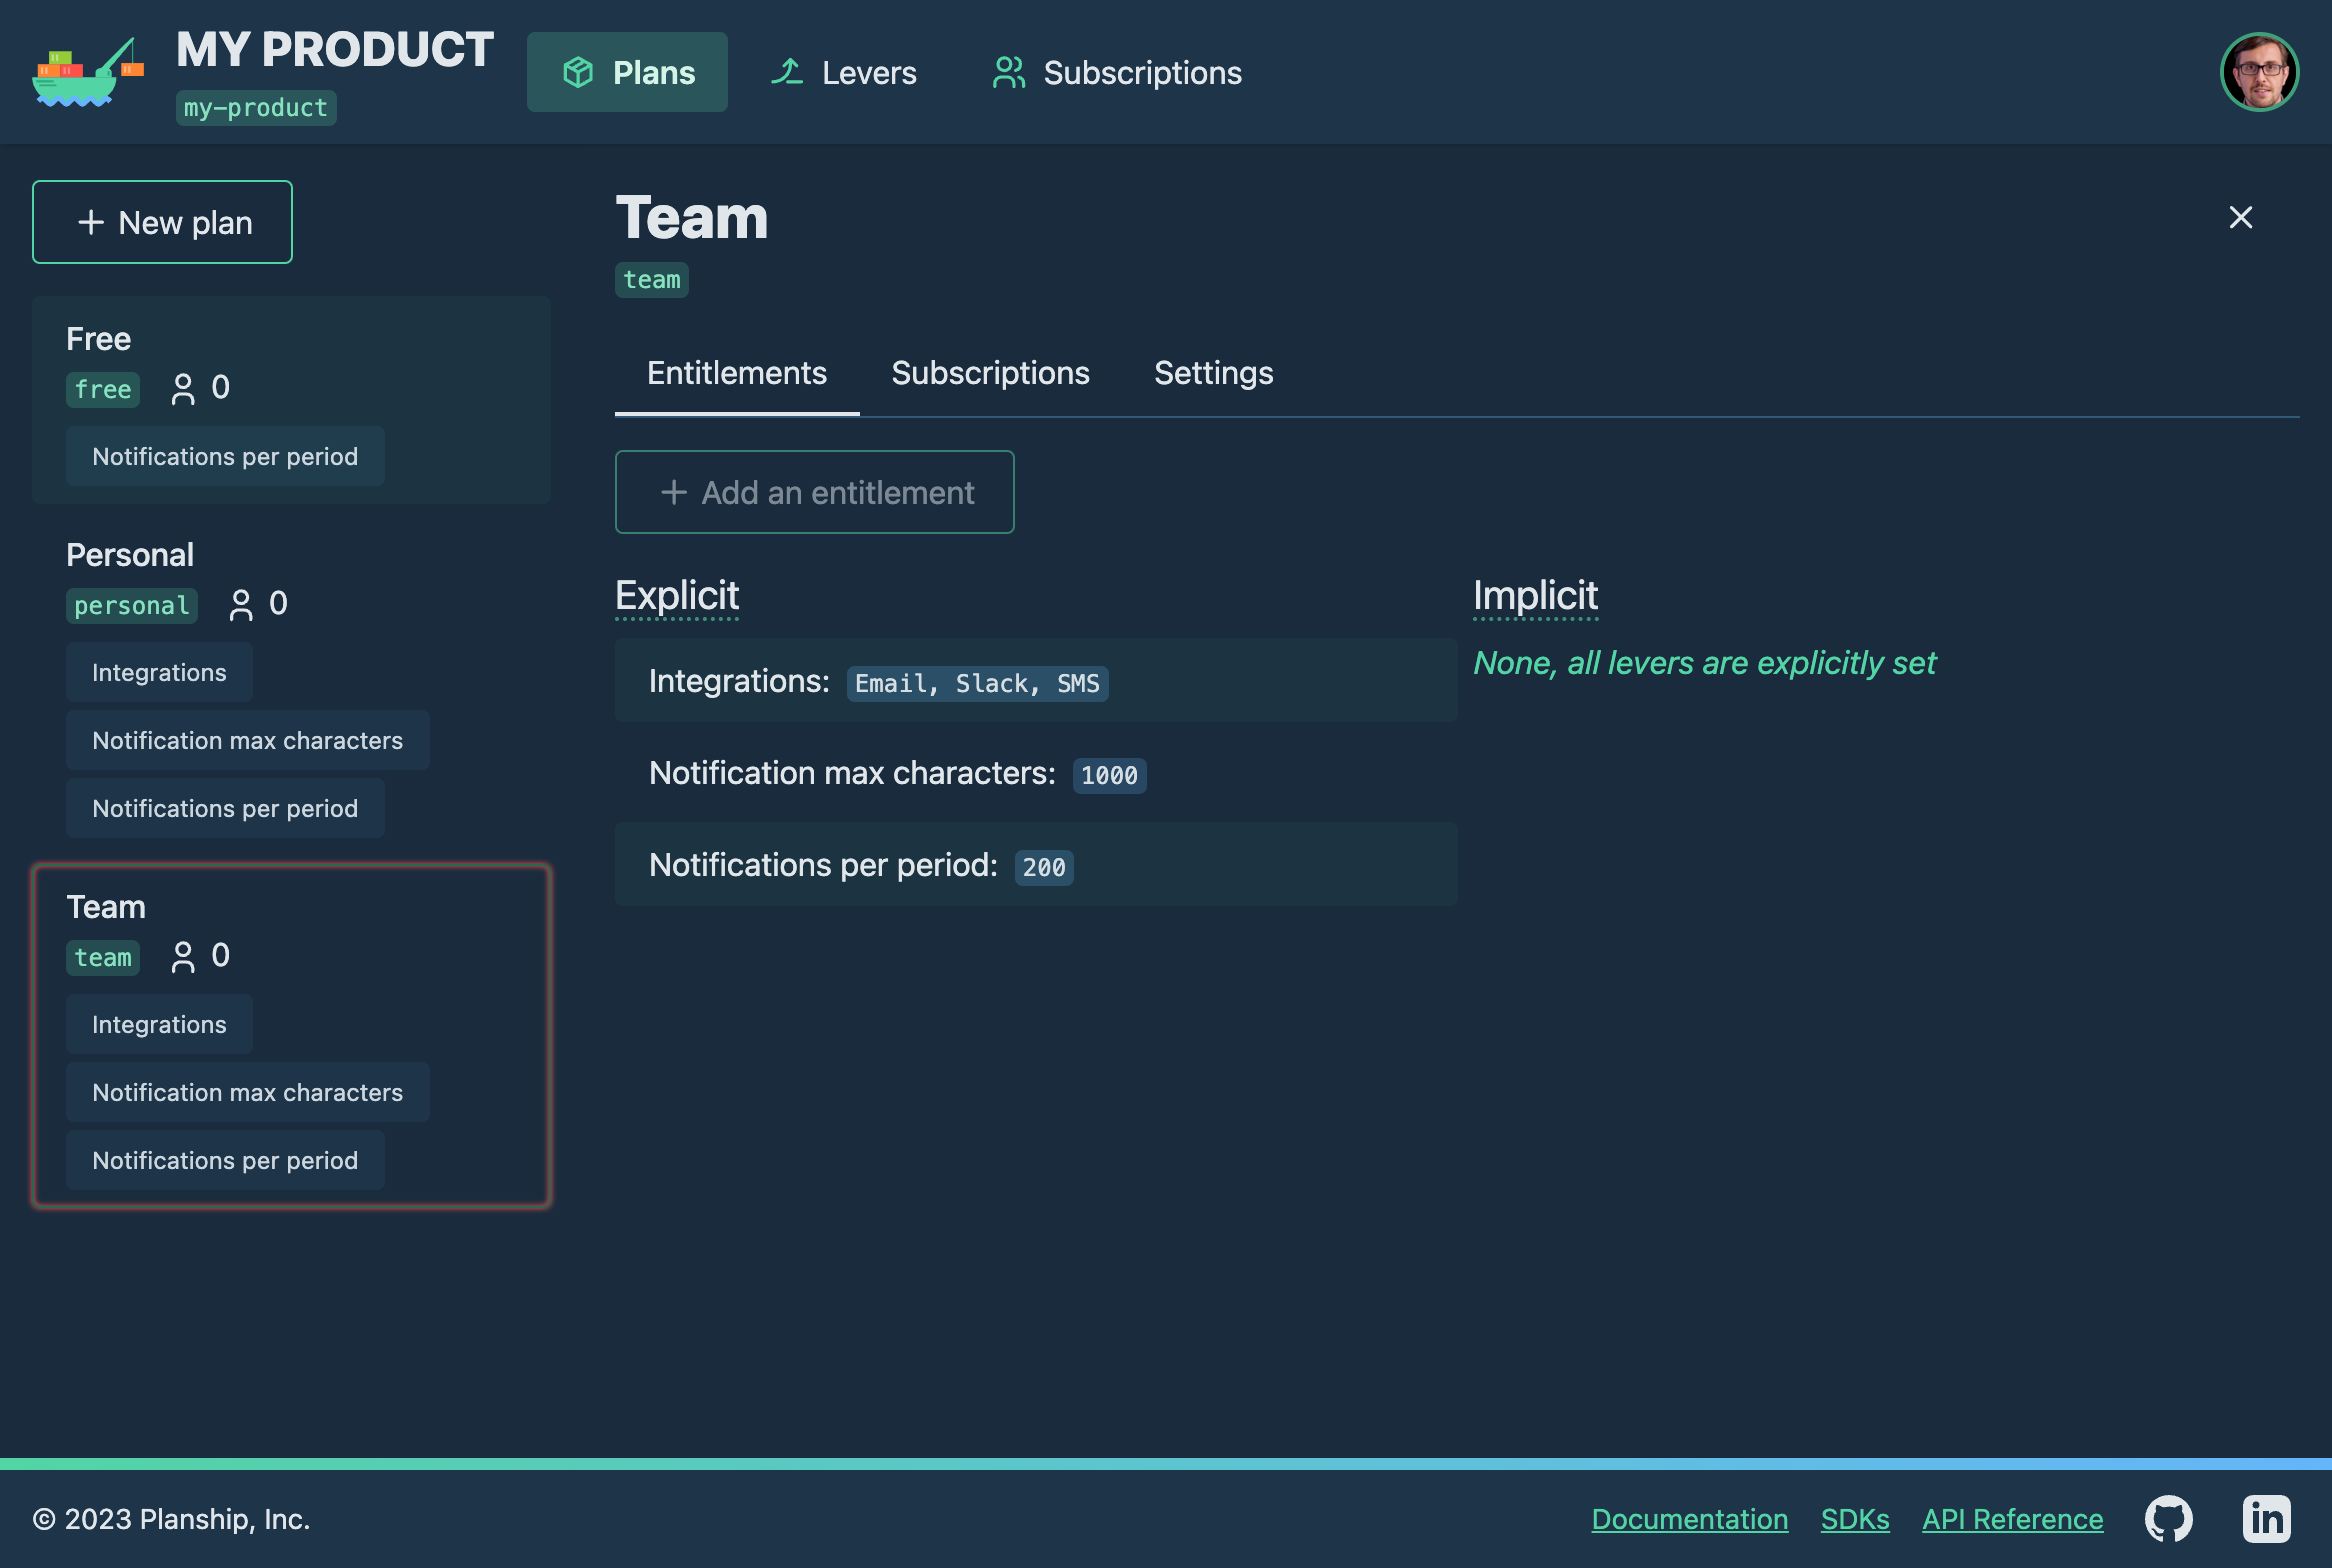
Click the New plan button to repeat the process for the Personal plan. The Personal plan should include both Email and Slack integrations, up to 50 notifications per subscription, and a 240 character limit.
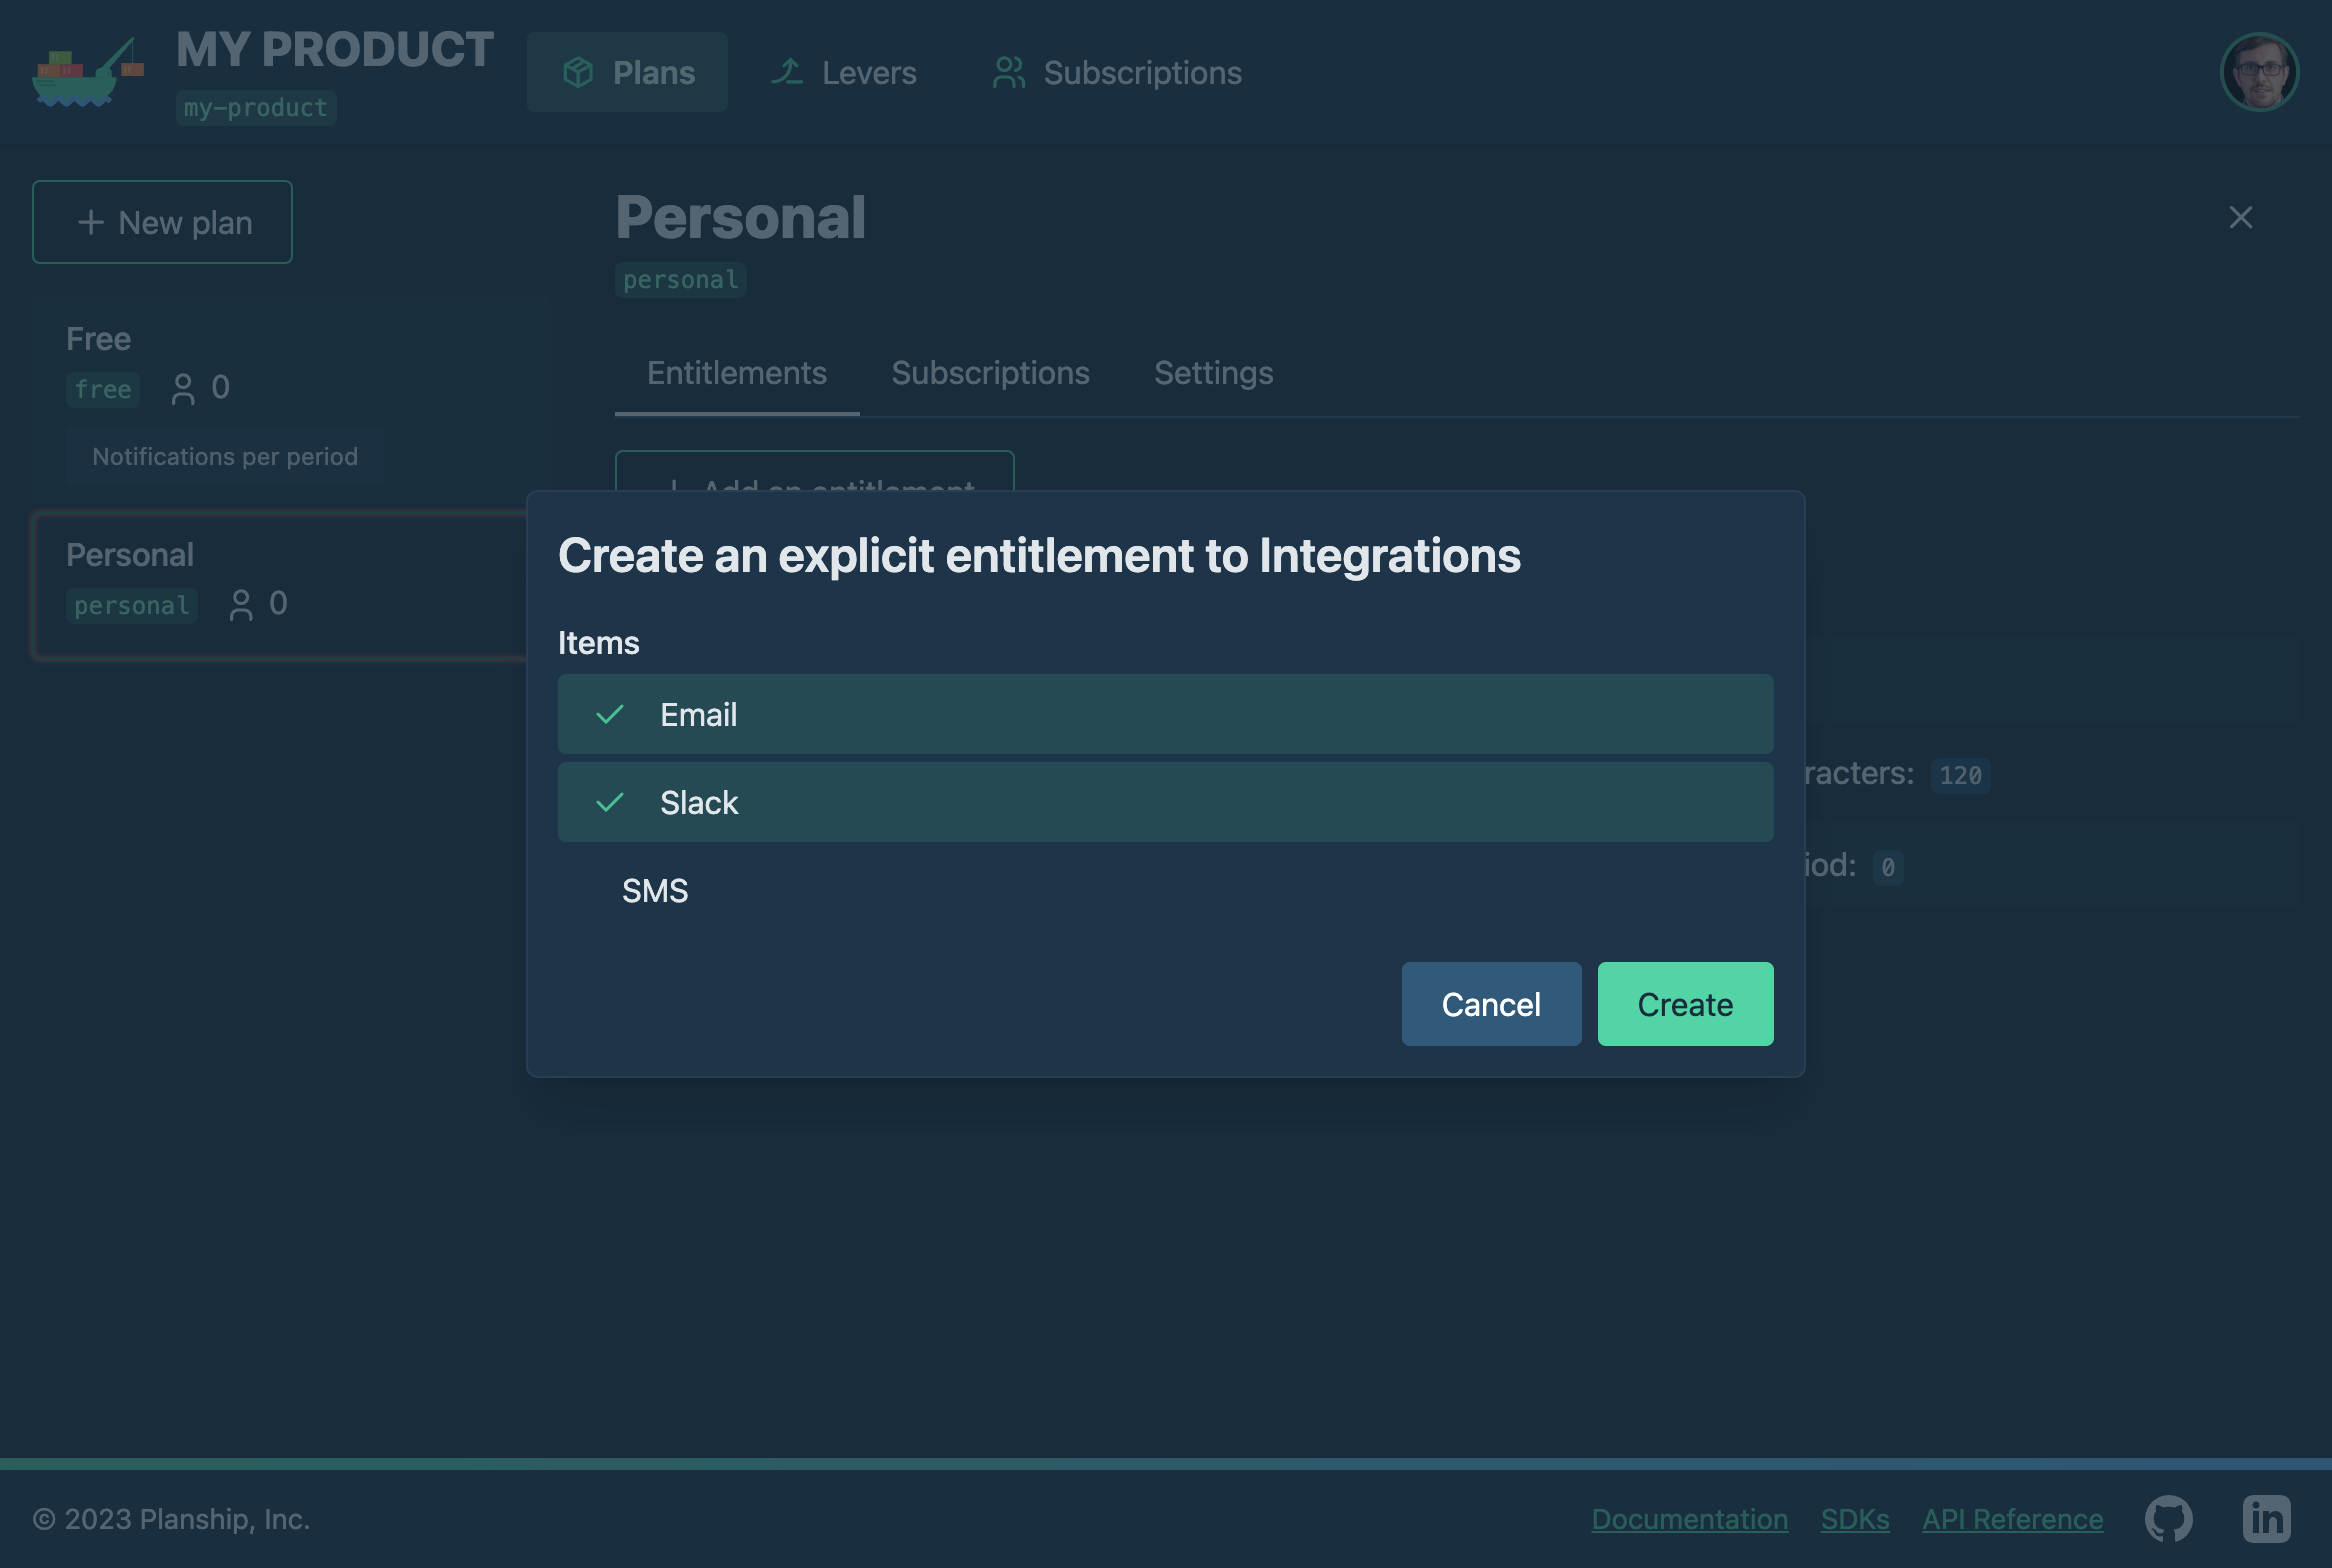
To accomplish this, we need to replace the plan's implicit entitlements (default values) with explicit ones. Let's start with the Integrations lever by clicking on its implicit entitlement, or the New entitlement button and choosing Integrations from the list. Then, select the Integrations values that should be supported on the Personal plan (Email and Slack), and click the Create button to save your changes.
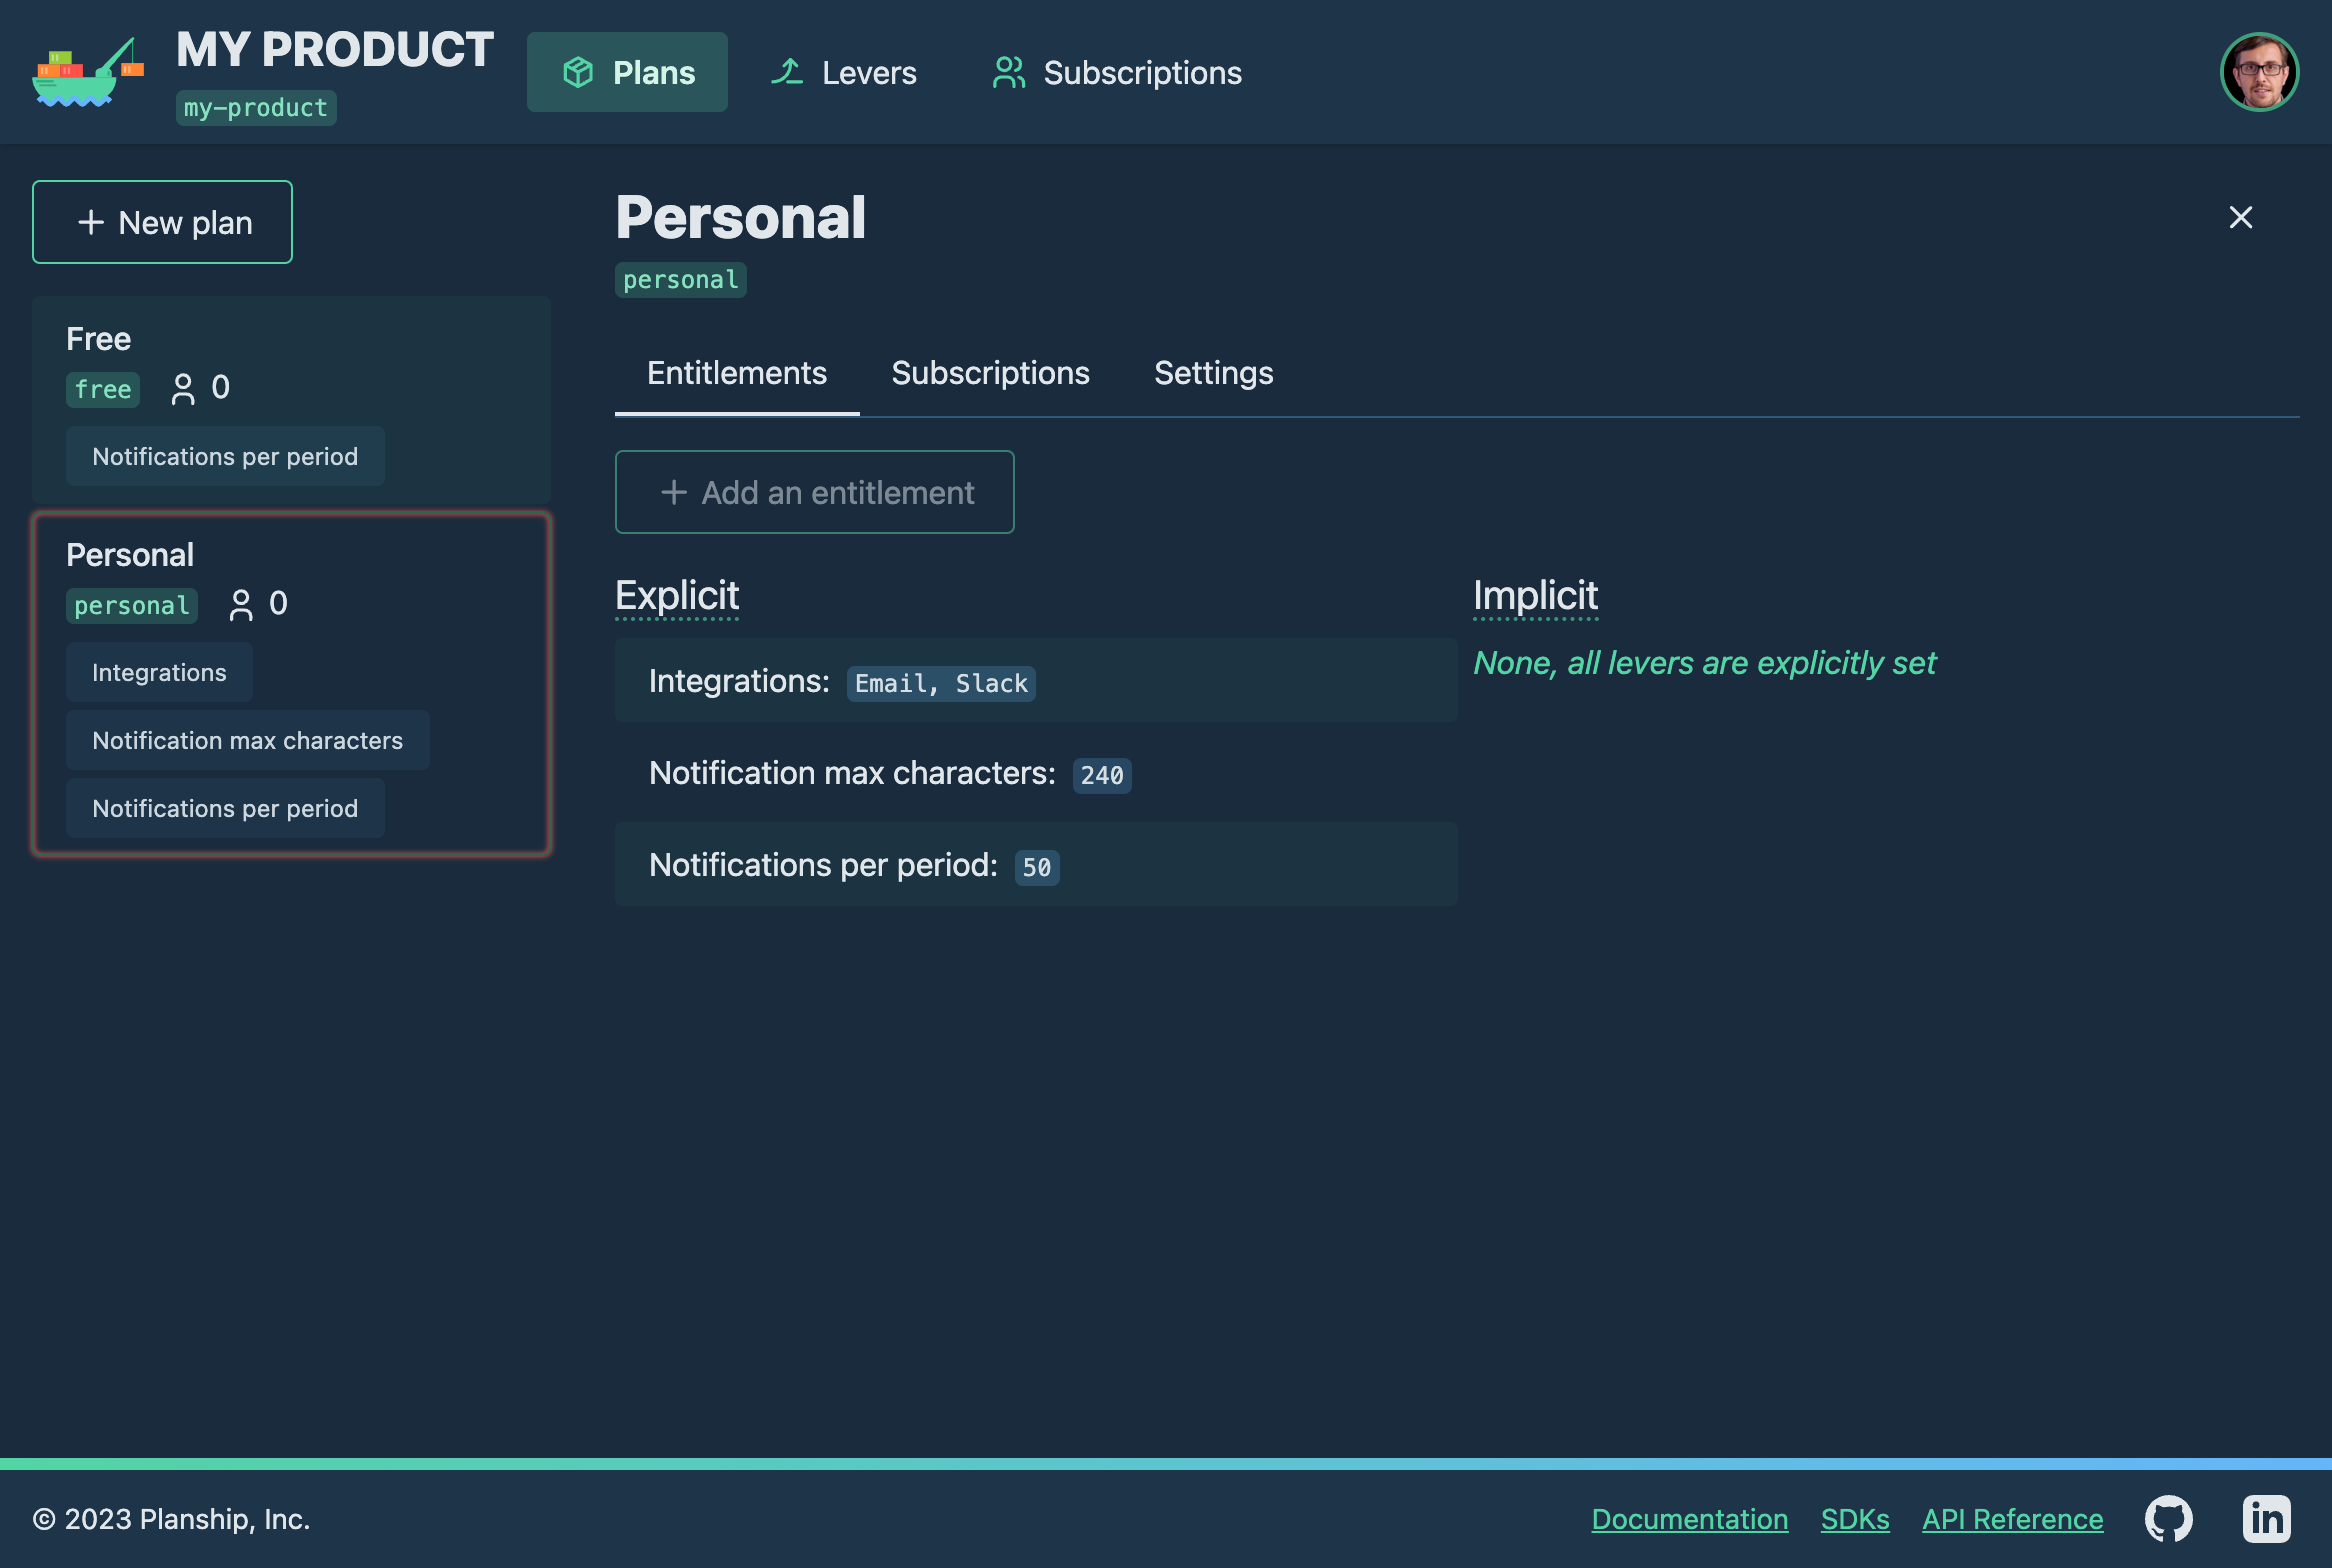
Repeat the process for the remaining two levers until all entitlements match the desired values for the Personal plan, and follow the same steps to create the Team plan with the desired entitlements.
Next steps
With our new product fully defined including levers, plans, and plan entitlements, we can now register customers, subscribe them to plans, retrieve entitlements, and more through the Planship SDK of our choosing. To get started, check out the Planship code integration guide.